Enthusiasts of British Motor Vehicles Built Before 1985
  • Home
    • About >
      • Join our Club
  • News
  • Events
  • Shop
    • Insurance
  • Blogs
    • Submit a blog
  • Galleries
    • The Ian Hope Collection
    • Brits Abroad - Australia
    • 2019 >
      • Yorkshire Moors Driving Tour 2019
      • Lancaster Insurance Classic Motor Show NEC Nov 2019
      • New Forest Driving Tour 2019
      • Gloucester Vintage & Steam Extravaganza Photo Gallery 2019
      • Tour of the Dark Peak Photo Gallery 2019
      • Codgers do the Cotswolds 2019
      • Bubble Car Museum Gallery 2019
      • Brecon Beacons driving tour 2019
      • Morgan Factory tour 2019
      • Practical Classics Classic Car & Restoration Show 2019
    • 2018 >
      • Lancaster Insurance Classic Motor Show NEC November 2018
      • Isle of Wight Tour 2018
      • Brunel's Somerset Tour Gallery 2018
      • Gloucester Vintage Extravaganza 2018
      • Maesteg Charity Classic Car Show & Driving Tour 2018
      • Bubble Car Museum & Driving Tour 2018
      • Peak District Driving Tour 2018
      • Practical Classics Classic Car & Restoration Show 2018
      • Coventry Transport Museum 2018 >
        • Joel Lodder's 2018 Coventry meet gallery
    • 2017 >
      • Lancaster Insurance Classic Motor Show NEC November 2017
      • Snowdonia Driving Tour 2017
      • Gloucester Vintage Extravaganza 2017
      • Lupin Farm Charity Car Show 2017
      • The Shackleton Trust 2017
      • Crich Tramway Museum 2017
      • Bubble Car Museum 2017
      • Pride of Longbridge 2017
      • April 2017 Practical Classics Restoration Show (NEC)
    • 2016 >
      • Crich Tramway Museum 2016
    • 2015 >
      • Bubble Car Museum 2015
      • Coventry Transport Museum 2015
  • mailing list
  • Sponsors
    • Alvaston Press Ltd
    • Lancaster Insurance Services Ltd
    • Richard Edmonds Auctions Ltd
  • Contact

Members blogs

Categories

All
Alan Warwick
Andy Perman
Brett Richardson
Brian Allison
Brits Abroad
Callum Tooey
Daniel Bysouth
Eddy Glass
Eric Dalton
Gar Cole
Graeme Moore
Graham Hemsley
Group Events
Holly Bush
Jim Lodder
Joel Lodder
John Lonergan
John Simpson
Kevin Thompson
Mark Smith
Matthew Homburg
Members Recollections
Mick Masters
Mike Peake
Nicholas Webb
Nick Arthur
Paul Sweeney
Projects
Steve Favill
The Weekly Groan
Tony "Tosh" Brooks
Unsung Heroes

Archives

December 2020
October 2020
September 2020
August 2020
July 2020
June 2020
May 2020
April 2020
November 2019
October 2019
September 2019
August 2019
July 2019
June 2019
May 2019
April 2019
March 2019
February 2019
December 2018
November 2018
October 2018
September 2018
August 2018
July 2018
June 2018
May 2018
April 2018
March 2018
February 2018
January 2018
December 2017
November 2017
October 2017
September 2017
August 2017
July 2017
June 2017
May 2017
April 2017
March 2017
February 2017
January 2017
December 2016
November 2016
September 2016
August 2016
June 2016
May 2016
April 2016
March 2016
February 2016
January 2016
December 2015
Reliant Rialto 2 Restoration Part 14

1/2/2018

0 Comments

 
by Kevin Thompson
And now... the end is near ....
Picture
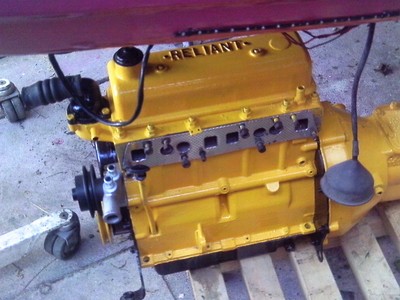
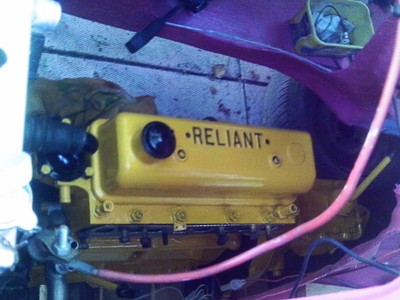
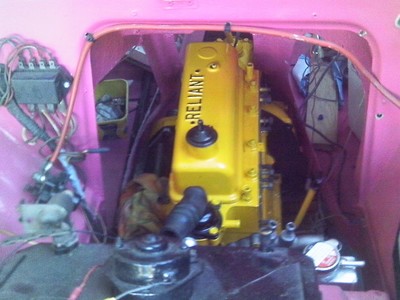
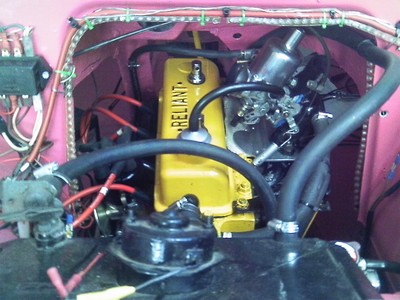
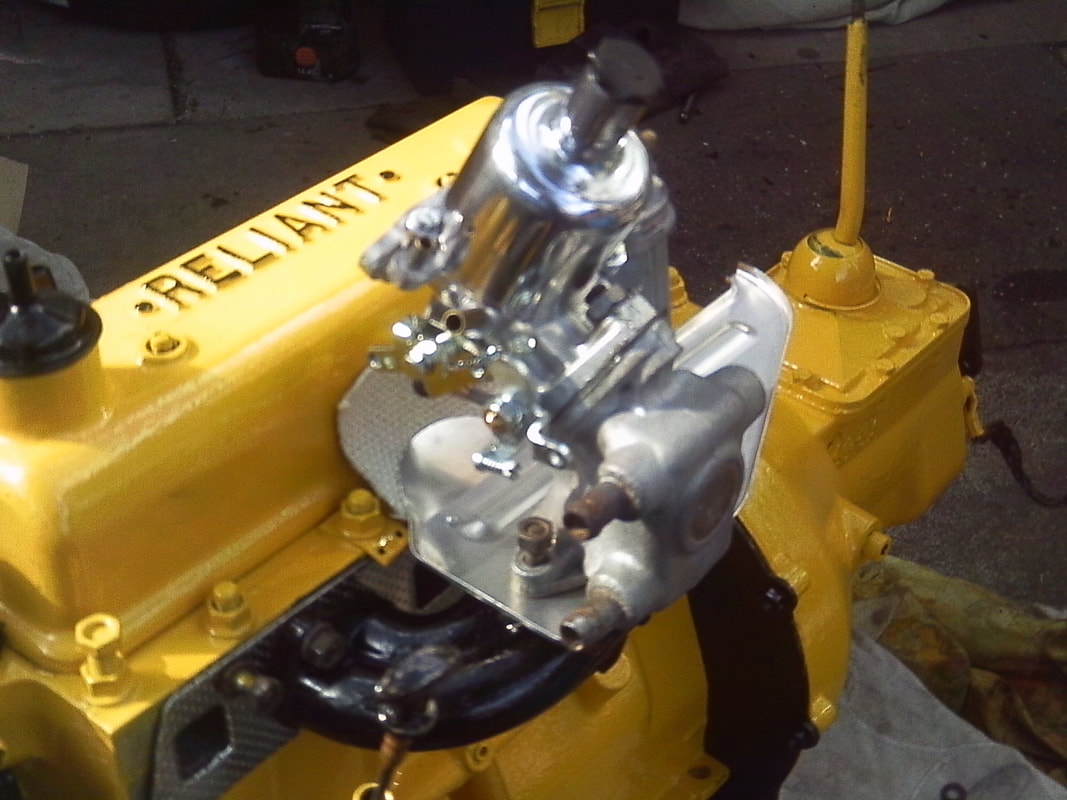
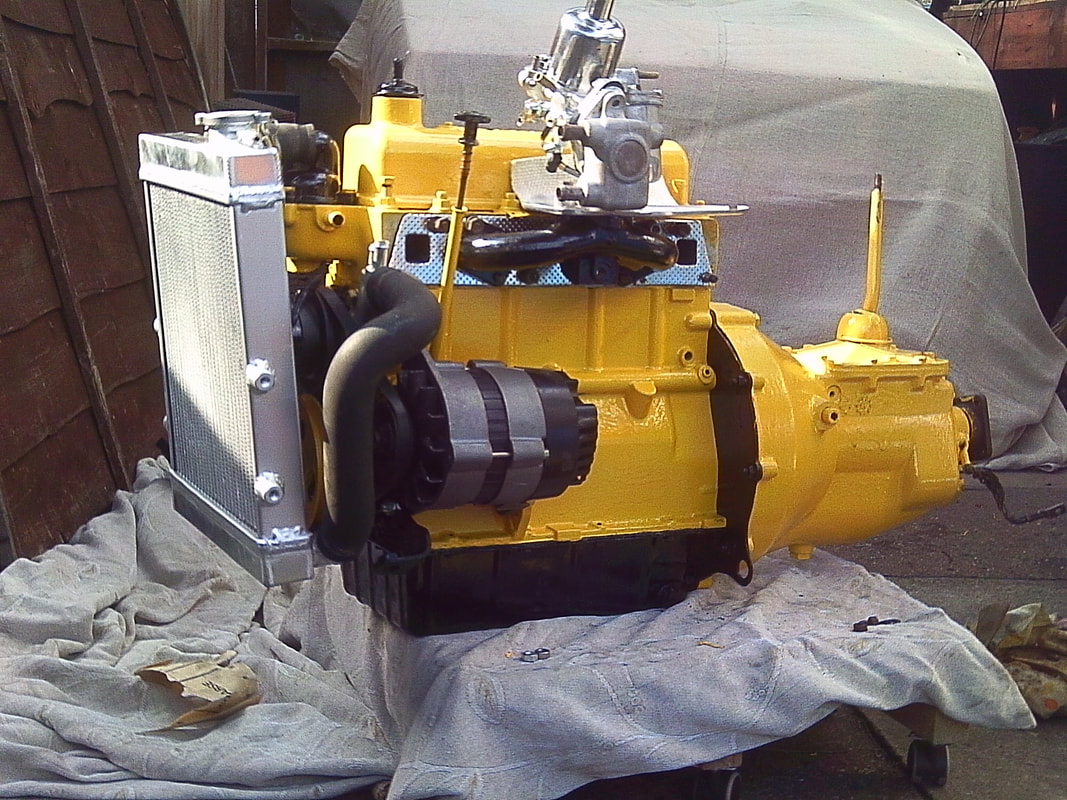
So all is installed as in last part 13 I couldn't find the engine pictures with it fully built with shiny bits, but having done so i can now show you what it would have looked like in it's prime condition. I wish it looked like that today!

Here are just the engine photos for now. Hopefully in part 15 it will be the end of the blog for this resto as you can see, no expense was spared here everything was new it was just fitting it all as you see it to make sure they was fitting ok so there you have it sorry it's short and sweet but in part15 I'll make it a bit longer in the last part to come soon - enjoy!
Picture
More by Kevin
0 Comments

Reliant Rialto 2 Restoration Part 13

9/1/2018

0 Comments

 
by Kevin Thompson
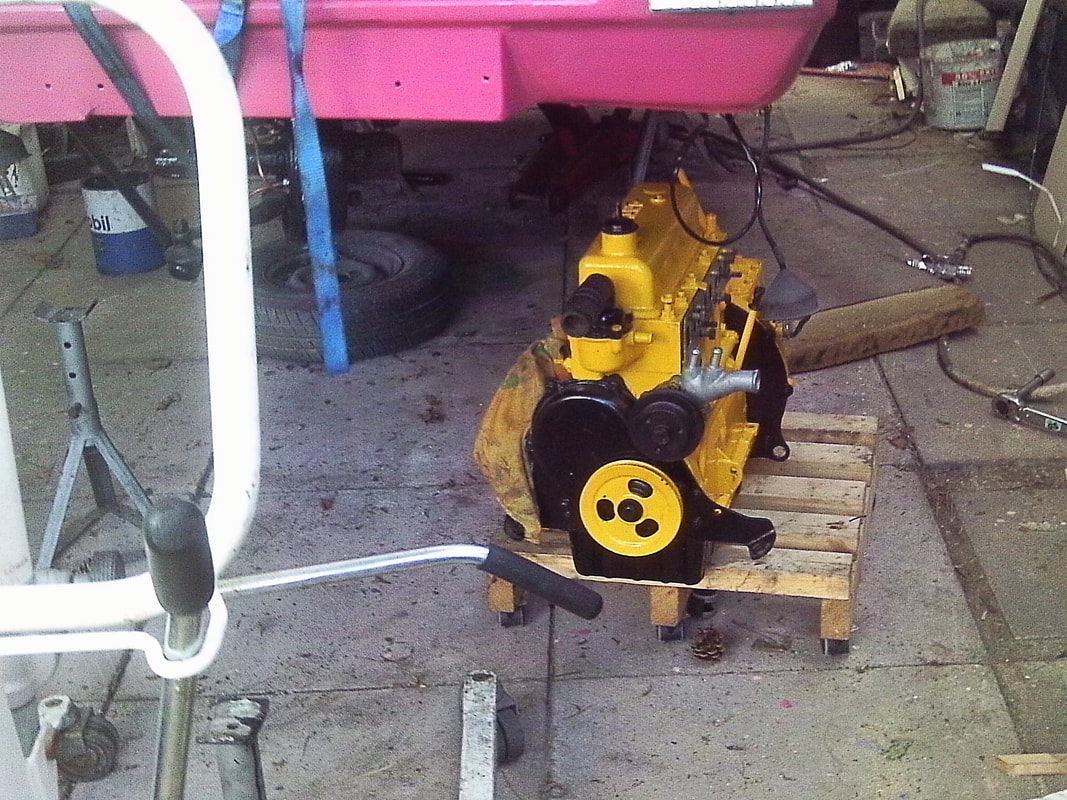
Well time for that unlucky for some part as I left of we had the engine cleaned up and new parts replace I have been looking for the picture of the engine all painted and new parts on it for some unknown reason I have lost them where I don't know where they have gone? 

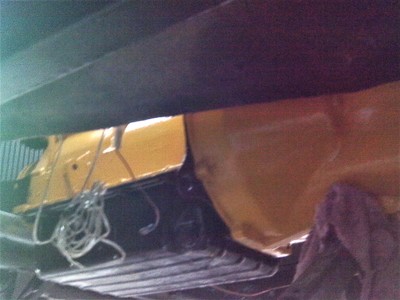
So the picture you will see is the one going into the Reliant now so as you can see the engine has to go under the Reliant no other way it's a to say the least as I have to raise it further into the air ( there must be another way I here you say ) nope that's it underneath sadley 
Picture
Nope so it's moved into place ready to lift up yes you heard right I had to lift it up but I used jack's to lift this lump up so after a few and a very strong words it was up and in the chassis mounts at the front then had to raise the rear then bolt that up.
Then it was bolt all the rest of the new parts onto the engine rebuild after much rebuilding later it was time to test and run the engine took a few turns but fired up and ran for a few min's let kool down and tighten up all nut's and bolt's etc.

So now I have rolling running electrifying running Reliant after 3 years of rebuilding it but not finished there yet - more to come in part 14 
More by Kevin
0 Comments

Reliant Rialto 2 Restoration Part 12

6/12/2017

0 Comments

 
by Kevin Thompson
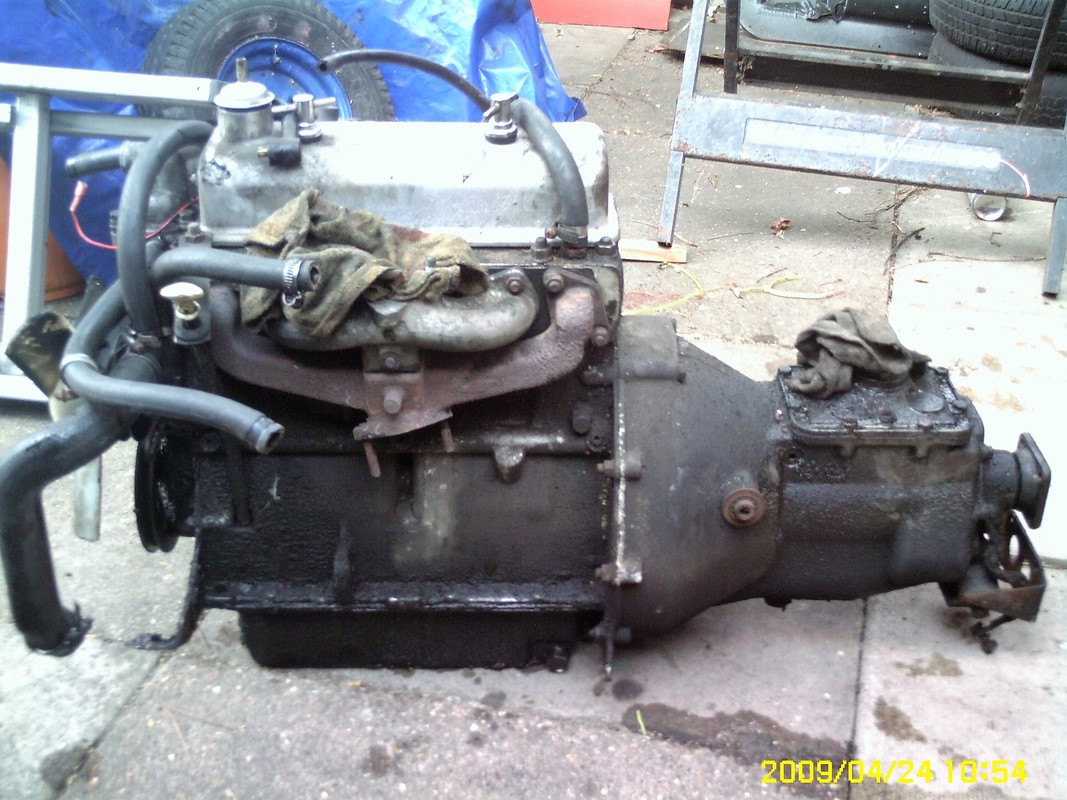
​Well it's that time for the ENGINE the eeeeyuuk time as you can see from it it had not been out since it was put in gleaming from the factory so the 30 years of grime oil spill's (not by me) that collected over the year's 
Picture
It's a wonder it did not add weight to it even the gearbox was filthy anyway it was part striped as you have to take starter and alternator and the rad off so it would drop from below yes mine has to go from the bottom not the top like some so was a challenge to get the reliant up high enough for it come out so set to stripping all that need to come off.
I took off the rocker and ohh it's looks like I caught it in time the head gasket must have be going explains why it was running a bit rough and few other things the engine mounts were broken too but it did look nice all cleaned down but apart from all gunk it had on everything was all ok it had some new seal's to replace front and back and have the gasket it done as well I had ordered new dizzy and cap new plug's oil filter gasket set piston's look fine crank look ok no score's put new timing chain on and tensioner new engine mounts and gearbox mount's then when everything was back it was time to paint up the engine.

Well that's it for this year will continue after the new year thanks for following my project through these coming month's I promise it will be finished soon not much more to do but paint up the engine tune up and put back in the reliant so until see you in the new year

Thanks - Kevin 
More by Kevin

0 Comments

Reliant Rialto 2 Restoration Part 11

4/12/2017

0 Comments

 
by Kevin Thompson
So after being high as a kite with all the gluing etc I had to take a break as it was no good putting in screws upside down so I left it for a while.
Picture
So the next day I finished of the back end having all the cut out's done and boarding all the rear out and putting extra cubby hole's in I got it finished just need to carpet it next.
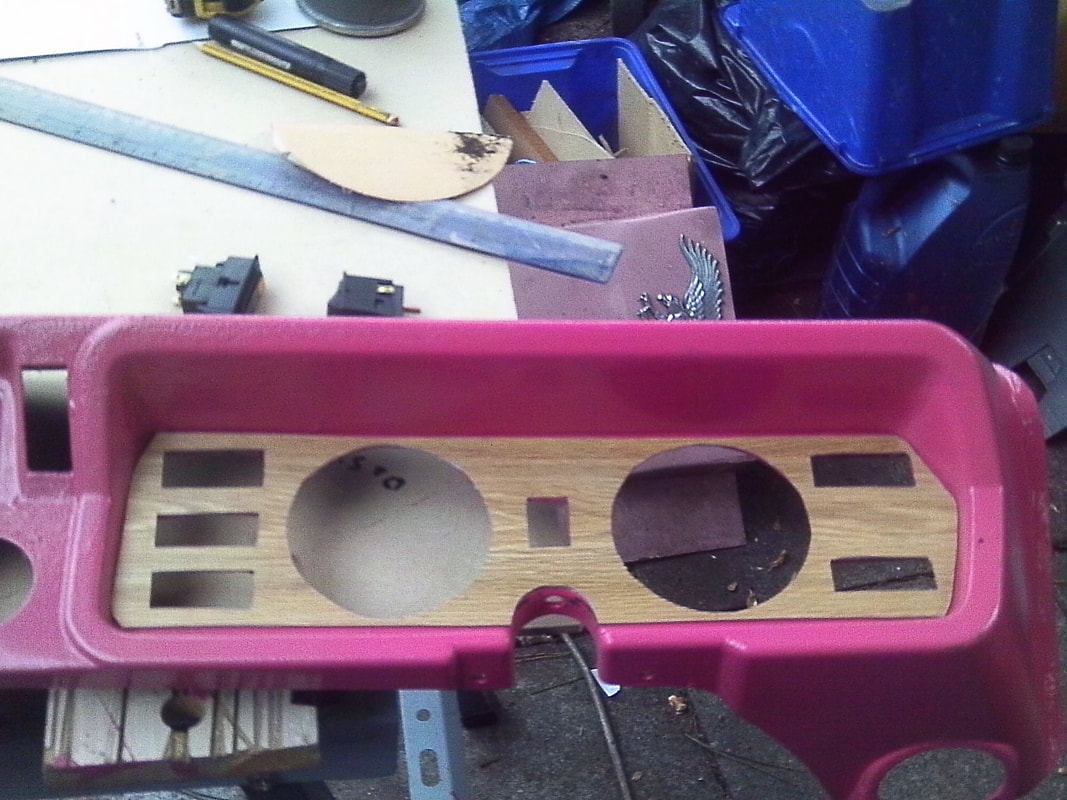
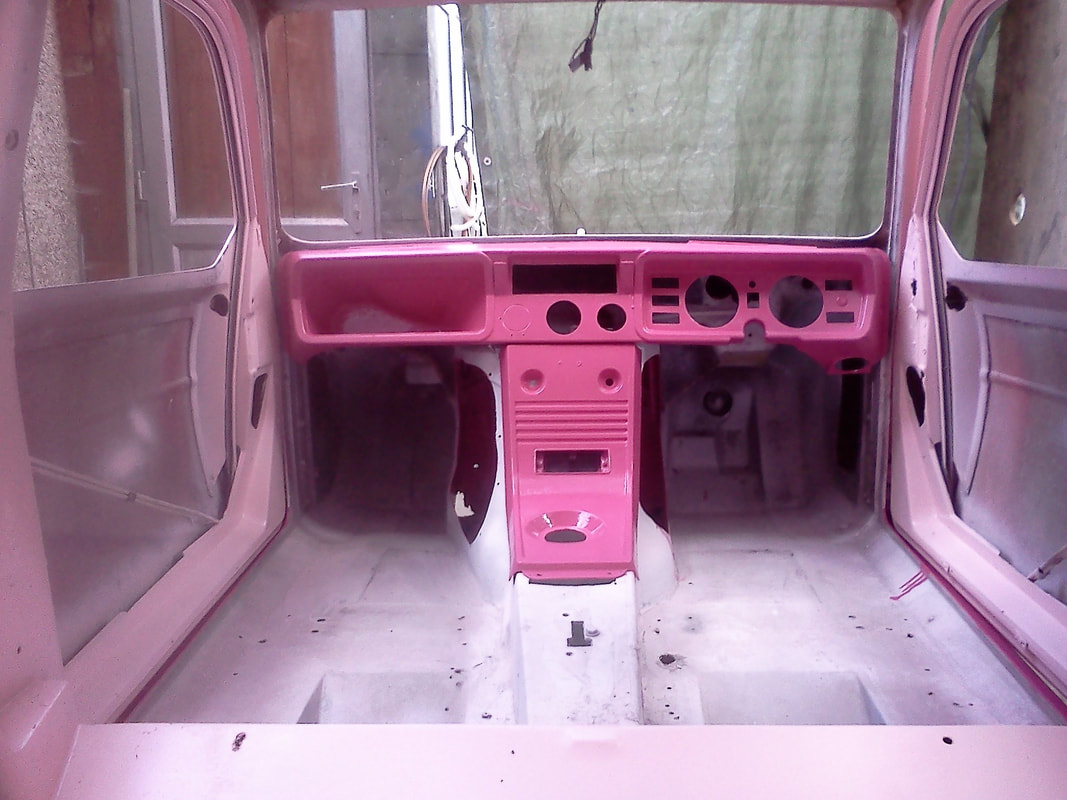
Then it was back to the door cards they need some much upgrading did not like the colour so they got painted too then when that was done I went and did the front dash in the same colour refitted it with all the clock's and dials fitted as well no photo of that am sure I took one might be on another flash drive.

Anyway I got a stage I was almost done within the Reliant so I next thing was the engine that had to be cleaned and painted yes even the engine got the treatment too so I will submit that in next episode.
More by Kevin
0 Comments

Reliant Rialto 2 Restoration Part 10

17/11/2017

0 Comments

 
by Kevin Thompson
So where we left off with windows roof lining fitted the wiring the wheels running gear electric's sorted then came some wood work in the rear of the reliant. 
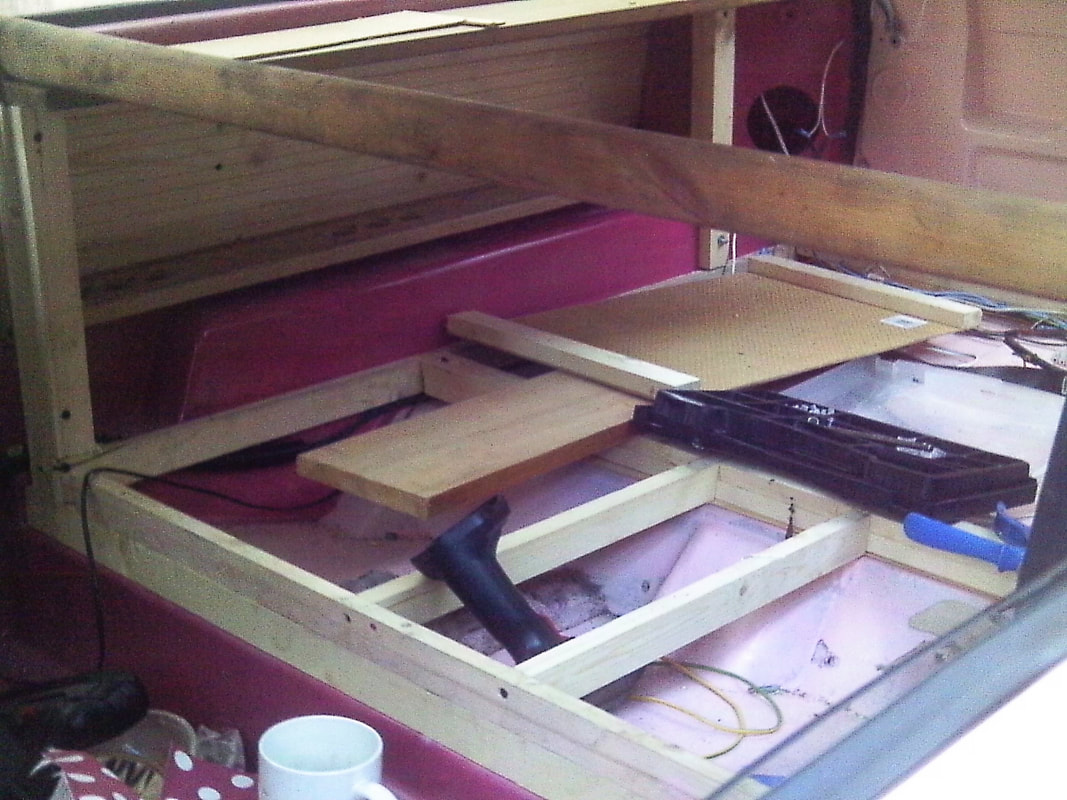
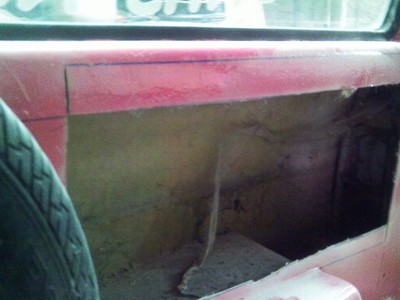
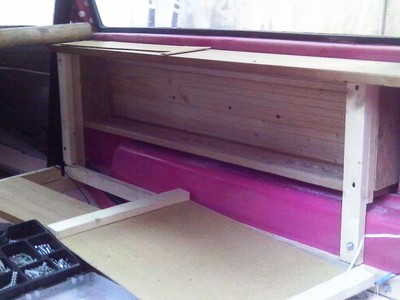
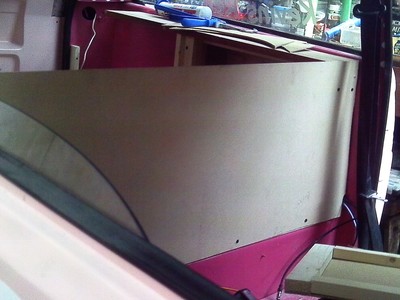
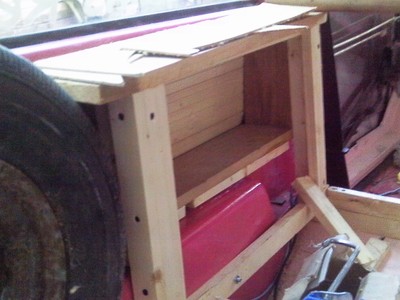
As I was not going to be putting the rear seat's back I though I would lift up the back section a couple of inches so I could fit most of the rear electric's in and fit some box's in too ( did I mention electric's again ? ) sigh yes I added some more complicated wiring ​
Picture
More on that later so did this to the back end of the reliant the first picture show's as it was before I cut out a section next was a big hole cut out as you can see in the next picture it is a big hole but I filled it in with a box I made too on both side's as in the third picture and the forth picture the other side was smaller due the spare wheel being in the way and the was no where for it to go so next in the firth picture went in the frame work for the are to carry spares ect same with the boxes I fitted too they will have door's fitted to them in the sixth picture you see I fitted a back board the go's behind the front seat's that was carpeted later
​The frame was going ok till I ran out off timber so off I went to local timber stores for more wood and screws and nail's tell you truth I never used the nail's really as used mostly wood screw's and glue was high as a kite with evo-stick glue ( but it dam nice enough of that back to what you was doing ) oh sorry yes where was I ? WELL have to wait for part 11

More by Kevin
0 Comments

Reliant Rialto 2 Restoration Part 9

6/11/2017

0 Comments

 
by Kevin Thompson
So, after fitting all the wiring and lights for as many weeks and months as it took me, after blowing countless fuses and burning out some wires it was all sorted now. Then I had the task of re-fitting the windscreen and side windows. The back window never came out as it refused to do so. It was left in the door so that was one less window to do any way.

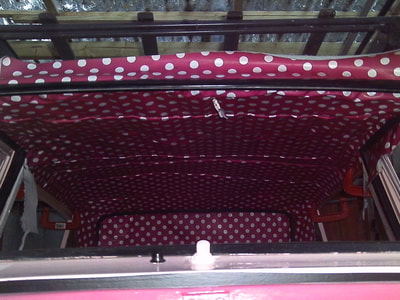
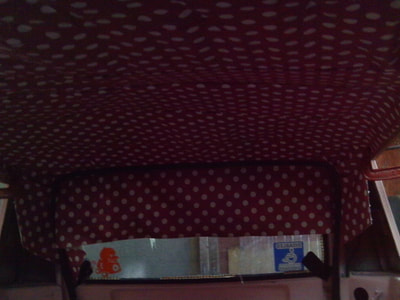
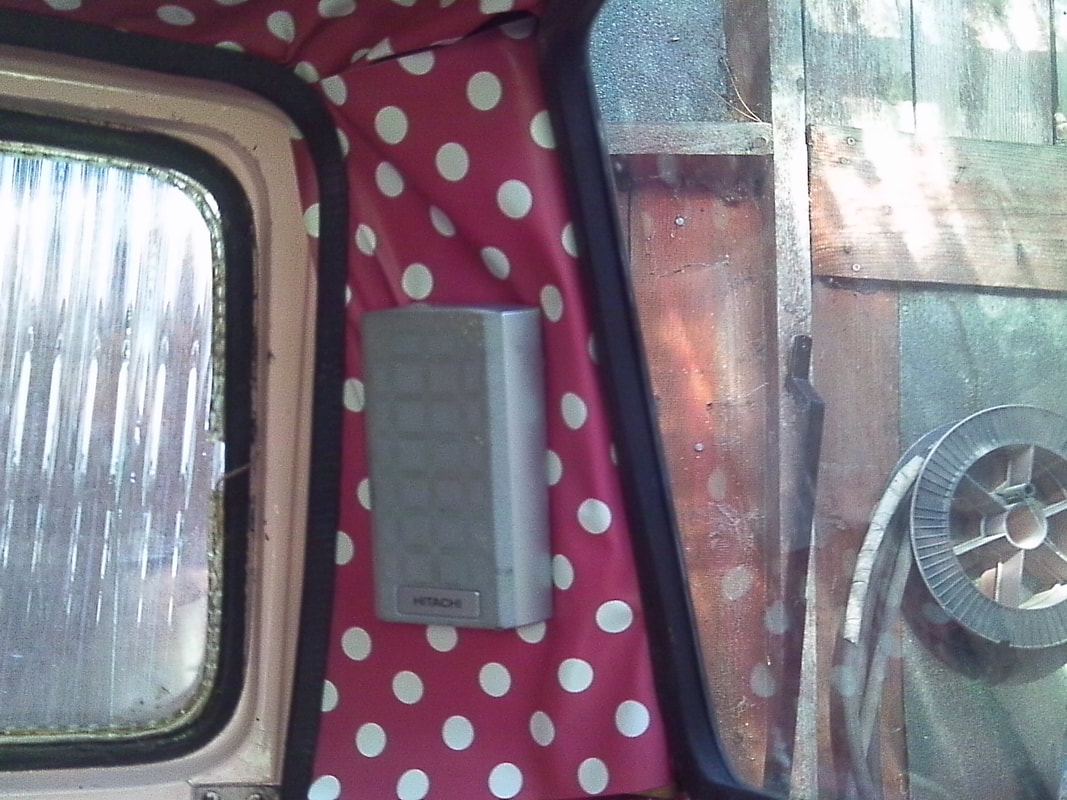
However, I had to fit the roof lining first as this needed doing before the windows. At this stage, Sheila had a say in the colour and did all the stitching. That took her best part of a week due to her hands not letting her do what she wanted through arthritis. She managed it thanks to her determination. So after that was done, it was back to me to fit it as can be seen in the pictures. It was a challenge but I did it anyway.
​Now it was time for the windows.  Oh God not the windows? Yes, the windows. Well the front screen went first. What a job that was! After a friend gave me a tool to use it was a doddle. Then the side window's went in. They fell in if you know what I mean lol. 
​While I was at it, I fitted in some speakers In the rear, but I changed them again later in the episode.  
Picture
​So, that was the main thing done, now body back on, running gear was back in, wiring was done, roof lining done and the windows back in. So what was left? We will have to see in part 10.
More by Kevin Thompson.

If you enjoyed Kevin's Blog, Please support the group - buy or donate in our shop


0 Comments

Reliant Rialto 2 Restoration Part 8

29/10/2017

0 Comments

 
by Kevin Thompson
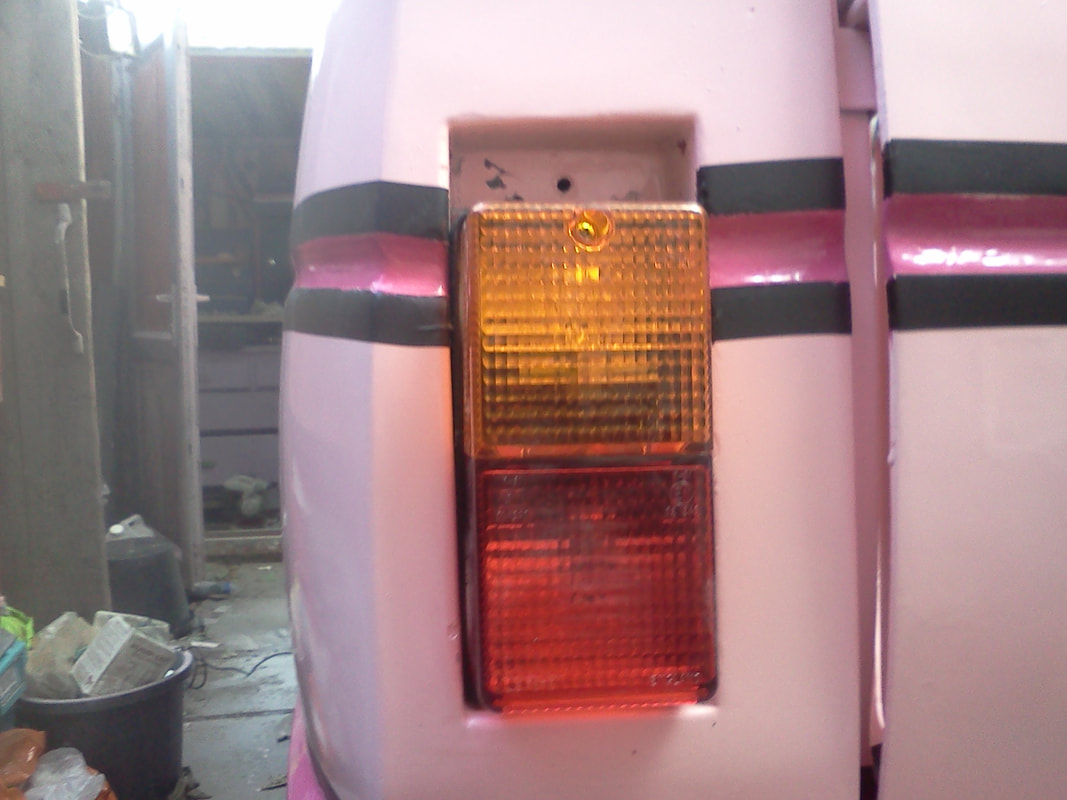
So we are at the stage where all the electrics go and all the lights too. I saved on the back lights as I told you in the last episode (part 7) I got some trailer lights as they were cheaper than the original ones costing £42 each and the trailer one's costing £5.95 each.
Picture
I know they're not original but I wanted something different too same as the front ones they are off a Land Rover; I think they are Defender ones but not sure also costing £42 each for the original again saving money as the Land Rover lights cost £5 each. So they were fitted and all working ( as shown in pictures ).

Then was the head lights to be fitted now as least these were still good and original I was thinking down the road of angel lights but thought no - I was trying to keep to a budget here. Then when all was fitted I went back to my laptop just to check my wiring was all ok and check all the circuits.

All was ok to stay. I am not fond of electrics really - I hate them as they always hurt you lol or you blow something and then you know about it.  Or you spend ages looking to find a fault but you never look at the fuse until you've torn your hair out. That's why am almost bald!

So that's the electrics all done but I will be fitting more lights for the inside (more on that later) but it was my next challenge to refit all the windows and headlining next but that's in part 9.
More by Kevin

If you enjoyed Kevin's blog, please support the group - give or buy in our shop

All profits help fund future group activities
0 Comments

Reliant Rialto 2 Restoration Part 7

11/10/2017

0 Comments

 
by Kevin Thompson
After all the painting was done it was time to do the dreaded thing - I think "Will this be  fun or not?" (cue music den den der ). OK - it wasn't that dramatic but yes -  it's time for the electrics!
"Oh crikey!" he says. "Who pulled them out?" (was not me) Well it was really... well after looking at some of it some was ok and some of it was not and had to be replaced. From the dashboard it ran down under the under body where it had 30 years of road dirt etc and was very brittle so that got replaced and trunked in side of the Reliant.
Picture
As you can see a couple of pictures I started to put the wiring back in. Now I am not very good with wiring but I did my very best with remembering where it all went. Good job I wrote everything down and pictures and copied everything as well just to make sure everything was going ok to a point.
I had to put my laptop on to see if I was going in the right place good job I could plug into the dash board (lol)

So the back lights had to be fitted now I could go for the original ones but they were way too expensive, so I got some trailer type ones that cost about £4.95 each and put them in but had to blank off the big hole at the back.

And this is what I did then I fitted the rear lights in but I will show them in the next part until then bye for now 

More by Kevin
0 Comments

Reliant Rialto 2 Restoration Part 6

3/10/2017

0 Comments

 
by Kevin Thompson
So I left off at part 5 respraying the Reliant. I said "the tone next" but I meant to say the Two Tone colours - my fingers are faster than me brain! lol 
Picture
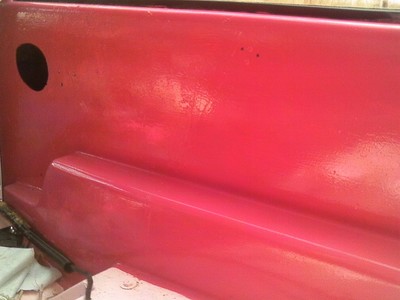
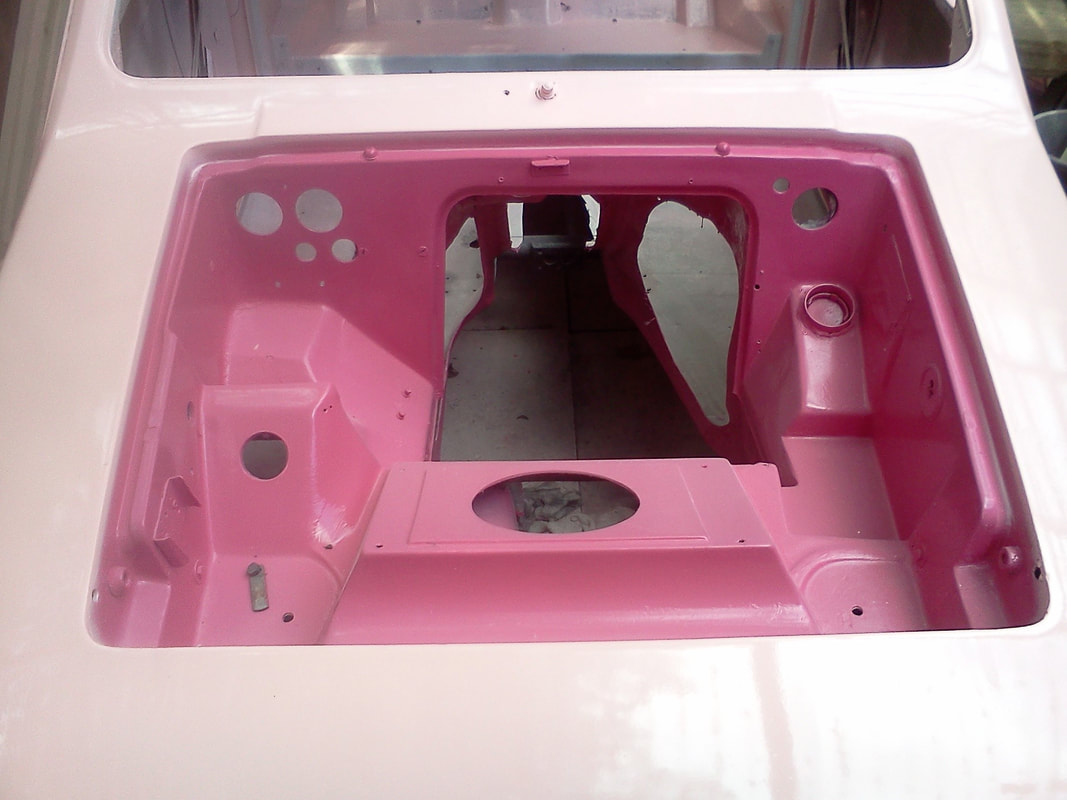
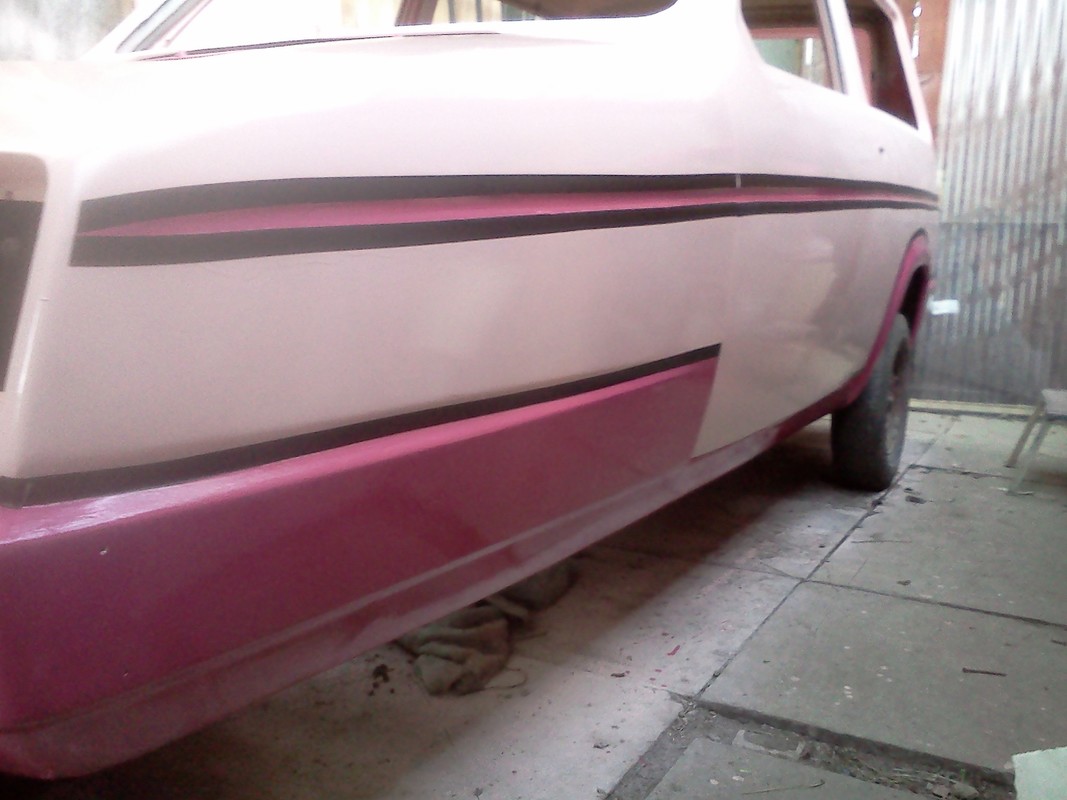
So after the final Top coat was on and dried it was the start of the two tone colour. It was a bit darker pink I forget the name anyway I wanted the engine bay a bit different this time so did it this colour. Looks lovely don't look like today lol 
Picture
Anyway it that was done it was to the dashboard and centre console. At this point I did hand paint these as I could get a better finish plus it saved time masking everything up as it was mainly inside.  It doesn't look too bad really.
Picture
Then it was on the outside of the Reliant. I had decided to a two tone down the bottom of the Reliant and all way round as well.
What I did next was put a black stripe down both sides and on the front and back. Also after that was done I left it for another day but in the meantime I carried on with other jobs too as I had run out of money. I had to do odd jobs but trouble was you start a job and never get back onto the main job you started in the first place so many weeks passed before I could get back onto the Reliant. I still was doing odd jobs so for now that was it.
Picture
Tune in next week same channel same time. Will he get it done? Or will it stay like that for another year? Tune in to find out what happens next!
More by Kevin
0 Comments

Reliant Rialto 2 Restoration Part 5

27/9/2017

0 Comments

 
by Kevin Thompson
Wahey - it's the rubbing down or NOT on the body (GROAN). It was endless rubbing, sore fingers, countless hours rubbing in corners where the orbital could not go. Why don't they invent something to go in corners?  Oh - they did - it's called your fingers!
Picture
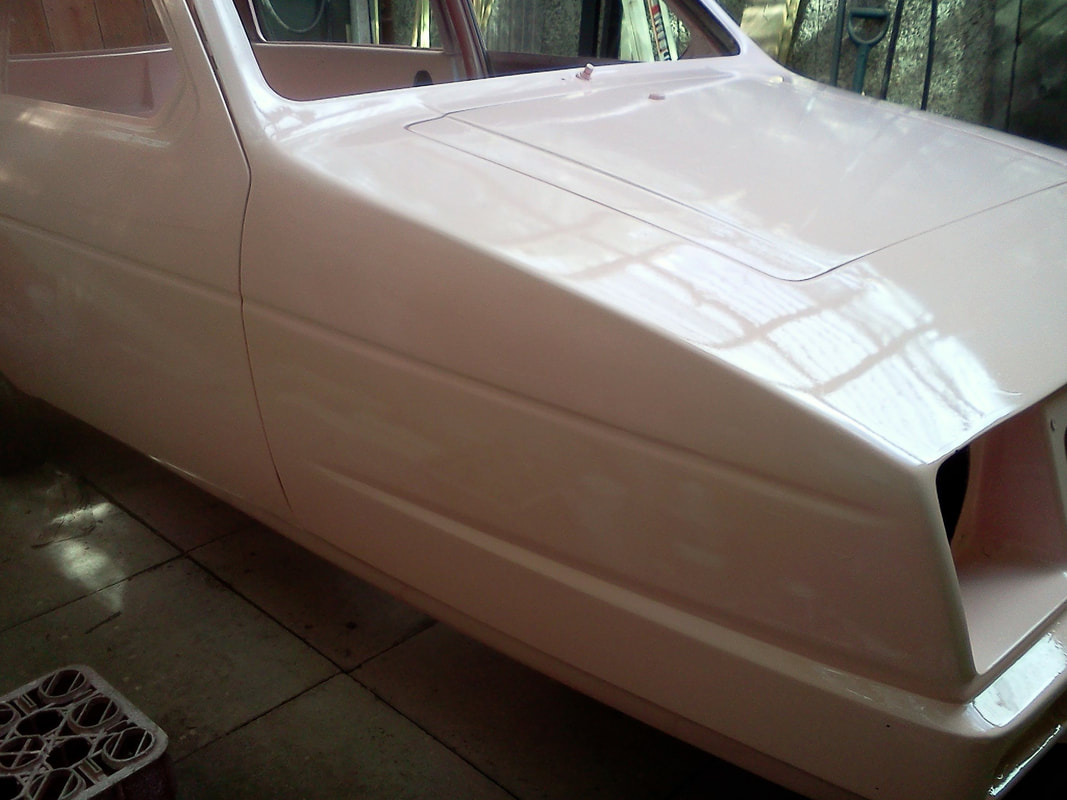
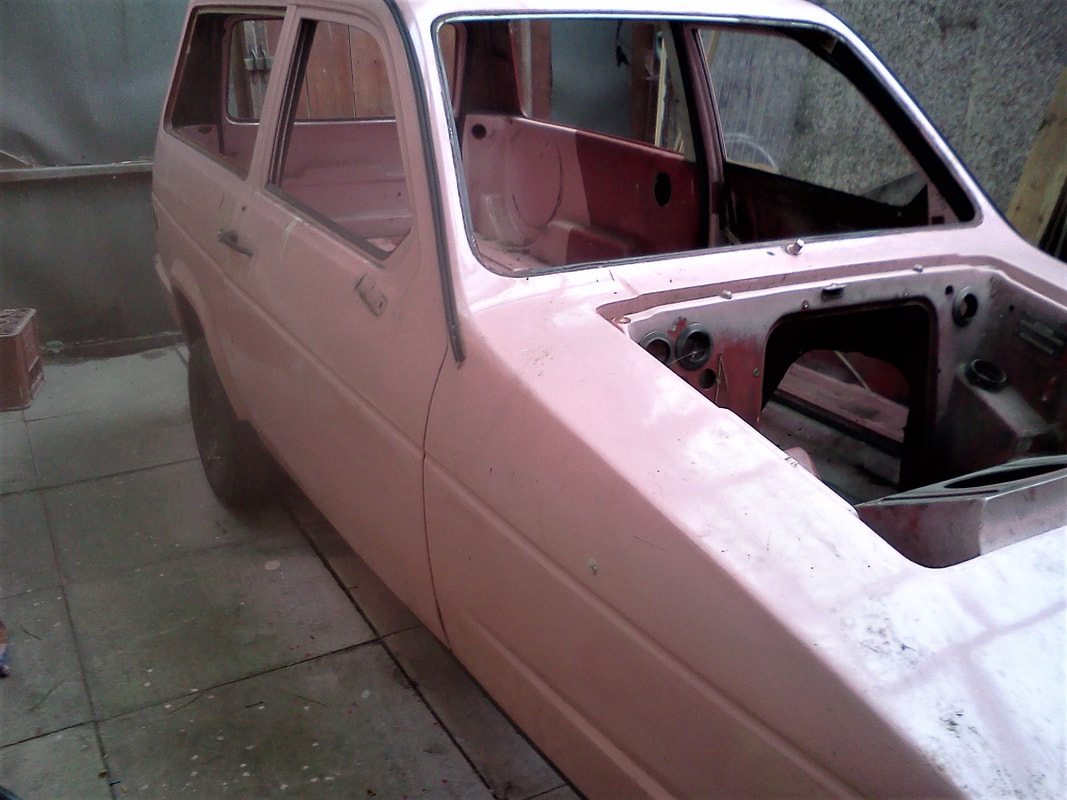
Oh well ... after a lengthy progress of rubbing and filling (who was it told me it's easy? Ha! By 'eck is it, like) so I finally got to a stage where it was ready for the under coat primer.  I did the engine bay first then got to do inside. As I was doing the whole lot I thought, "Why not?" and did the whole Reliant from top to bottom. After that was done I left it to dry. 
I went out to look at it the next day to see what a mess I had made, so cometh the next day and I was quite surprised. It was a pretty good outcome really as this was only my second attempt at spraying a car - yep, I was pleased. Now it was time to flatten down the primer as I had been told to do from an expert that I picked the paint from.

After I had done all this it was back to wiping it all down and clean from top to bottom and re masking it all again ready for the final top coat paint in the PINK.

So off I went in there with PINK and spray spray spray cough cough oh I forgot my respirator oops ok got it back on (mutter mutter) what I said (that's better lifting the respirator) it was going on pretty good too. Oops there's a run here and there but they came out when I put a second coat on later.
After a few hours I came out looking all pink - that was me I mean - but worth the job though. My wife Sheila was pleased, so while waiting it to dry for another day I made a start on other things that I will I leave for another episode - but I was still painting the body in between.

In the next installment - choosing the tone of PINK that was going on ... more next time in Part 6
More by Kevin
0 Comments

Reliant Rialto 2 Restoration Part 4

20/9/2017

0 Comments

 
by Kevin Thompson
We left off in part 3 with the chassis being painted then rubbed down and under coated then painted in black gloss - still just as good though.
Then I started on the back axle and all the wheel hubs and the shockers too with springs as well I went to on them all even the front A Frame as well!
In the next picture there's a guy who painted it all. I don't know who he is though lol but he was pretty good, so I let him paint the whole lot - saved me a job!
Picture
'On the job' .... settle down at the back!
Picture
After all that was done, I started to refurbish the steering box as it was weeping a bit and we cannot get another one any more as they don't make them.

If they did it would cost a fortune. Even today the second hand ones can cost around £150/200 but luckily I have 2 spares and they are mine! lol


​I might sell one - we will see - so it got a good clean and instead of oil in it I packed it with grease so it won't leak any more as they do fail in the MOT with leaks or weeping.

After all the cleaning and painting I left them all to dry. I had if I remember left them for a few days to really dry out ready for reassembly. That was done over a few days, rebuilding all with new shiny wimy parts and after a few days I had a rolling chassis again ready for the body to be put back on!

In part 5, I make a start on the Reliant's body 
​
More by Kevin
0 Comments

Reliant Rialto 2 Restoration Part 3

15/8/2017

0 Comments

 
by Kevin Thompson
Well left off at the body was ready to come off now and was on the floor awaiting prep but that shoved to one side.
Picture
It was the time for the engine to come out it was eeewwwww yuk dam well was filthy so it was a good strip down but before I did that I looked at the chassis. It was good as being galvanised but was going to clean it up and repaint it, so there was a lot of rust not one bolt came off peacefully most had to be grinded off even the prop nuts would not move after 30 on the road what would you expect.
Before
After
So after many words with it all the nuts and bolts were off now and had just the chassis all sanded down then I turned to my front wheel hub/axle. Good job I did take it off as it was starting to rot on the clamp sides ( you might just make it out) so after dismantling all what on it was scrap and had to source another one but that was later so after a lot of cleaning and wire brushing the chassis was ready for painting.
Next the time - the paint job.
More by Kevin
0 Comments

The Rialto 2 restoration from 2011 to 2014 - Part 2

11/8/2017

0 Comments

 
by Kevin Thompson
Picture
The Rialto in 2009
The restoration begins as you can see from the picture's it was pink and black. Anyway we did have different  colour schemes - first off was pink and white. 

Then we tried two tone pink. We  were toying with the idea of just having pink, but not agreed on anything just yet.
Picture
Then pink & black as you see it today
SO THE STRIP BEGIN'S 
 
Here you can see the pictures inside the Reliant. First the seats were removed, then the back seats, the seat belts, sunroof, centre console, dials, dashboard and all the equipment as I had to take the steering  column the pedal box hand brake anchor bolts and the remaining bolts that hold the body on to the chassis; then it was ready to come  off.
This took best part of a week as I had to do all this outside in open air (oh do wish could have a double garage!). The worst part was the electrics. Now I don't know about you but I HATE electrics - they never go right, always going wrong.

Well the back end of the cables were shot and brittle so meant a part total re-wire. This was under the Reliant body so was exposed to the elements (great), so I took out the whole wiring loom ( oh God I have gone and done it now - where does it go back when I re-build it ?)

Right so that was out, then it was down to the body near enough everything was out. The bolts were out you think, "Great it's ready"  ...  ha nooo there was one bolt I had missed! After much arguing and swearing to my self etc I finally got to take the body off using an old lifting aid to help me as shown in the picture below.
Picture
So one end was now up in the air and I now had to go to the front to make sure it was loose and not holding on anything like they do lol ..... and that is where I will stop for the next chapter :-)
More by Kevin
0 Comments

The Rialto 2 restoration from 2011 to 2015

8/8/2017

0 Comments

 
by Kevin Thompson
Way back in 2008 we bought this Reliant. A friend of mine said there a was Rialto going for a song so I said would be interested in buying it this was in Huddersfield, West Yorkshire.
Picture
So we both went to look at it no harm in looking is there nope there isn't so having a look around it as it was on breeze block's so I could crawl under it no problem it was all fine underneath. It was well plastered with oil on the chassis did not need it really as it was a galvanized one so would not have rotted anyway. The chap we got it off or getting it off only bought from new and after a while he just wanted to tinker with it so put it up on blocks and took off the tyres and stored them shame really as they do like to run all the time and never stood.
Picture
So upon inspection we started the engine and was a very sweet running engine after much looking hearing seeing it I will have it so there was a MOT station not far from where the Reliant was and got it booked in for the very next day. After we put on the tyres back on and raised it off the blocks and put it back onto it's wheels and lock it up again and left it the following day.
Picture
So the day came and went into the MOT station after a hour's wait we got a call from them saying it failed only on two things - so we went back and looked what it was and it had failed on the side light and the main anchor bolts to the chassis and main body.

So took it back home and started to repair the bolt took three drills to bore it out and finally got the new bolt in. I checked the side lights cleaned them up and got them working, rang the MOT up got it booked for the same day as it was only 2 things. It did not go through the full MOT again got there they looked at the 2 jobs I had done was all ok and gave my MOT so she was now back on the road ready to use.
So the next chapter is what did I do next? You will have to wait for Part Two to find out!
0 Comments

    RSS Feed

    This section will not be visible in live published website. Below are your current settings:


    Current Number Of Columns are = 2

    Expand Posts Area =

    Gap/Space Between Posts = 10px

    Blog Post Style = card

    Use of custom card colors instead of default colors = 1

    Blog Post Card Background Color = current color

    Blog Post Card Shadow Color = current color

    Blog Post Card Border Color = current color

    Publish the website and visit your blog page to see the results

Privacy Policy 

​Your shopping bag

Home

News

Blogs

Shop

Insurance

Contact

Picture
Picture
Picture
© 2020 Enthusiasts of British Motor Vehicles Built Before 1985
  • Home
    • About >
      • Join our Club
  • News
  • Events
  • Shop
    • Insurance
  • Blogs
    • Submit a blog
  • Galleries
    • The Ian Hope Collection
    • Brits Abroad - Australia
    • 2019 >
      • Yorkshire Moors Driving Tour 2019
      • Lancaster Insurance Classic Motor Show NEC Nov 2019
      • New Forest Driving Tour 2019
      • Gloucester Vintage & Steam Extravaganza Photo Gallery 2019
      • Tour of the Dark Peak Photo Gallery 2019
      • Codgers do the Cotswolds 2019
      • Bubble Car Museum Gallery 2019
      • Brecon Beacons driving tour 2019
      • Morgan Factory tour 2019
      • Practical Classics Classic Car & Restoration Show 2019
    • 2018 >
      • Lancaster Insurance Classic Motor Show NEC November 2018
      • Isle of Wight Tour 2018
      • Brunel's Somerset Tour Gallery 2018
      • Gloucester Vintage Extravaganza 2018
      • Maesteg Charity Classic Car Show & Driving Tour 2018
      • Bubble Car Museum & Driving Tour 2018
      • Peak District Driving Tour 2018
      • Practical Classics Classic Car & Restoration Show 2018
      • Coventry Transport Museum 2018 >
        • Joel Lodder's 2018 Coventry meet gallery
    • 2017 >
      • Lancaster Insurance Classic Motor Show NEC November 2017
      • Snowdonia Driving Tour 2017
      • Gloucester Vintage Extravaganza 2017
      • Lupin Farm Charity Car Show 2017
      • The Shackleton Trust 2017
      • Crich Tramway Museum 2017
      • Bubble Car Museum 2017
      • Pride of Longbridge 2017
      • April 2017 Practical Classics Restoration Show (NEC)
    • 2016 >
      • Crich Tramway Museum 2016
    • 2015 >
      • Bubble Car Museum 2015
      • Coventry Transport Museum 2015
  • mailing list
  • Sponsors
    • Alvaston Press Ltd
    • Lancaster Insurance Services Ltd
    • Richard Edmonds Auctions Ltd
  • Contact