Enthusiasts Of British Motor Vehicles
  • Home
  • News
  • Events
  • Blogs
  • Photo Galleries
    • 2025 >
      • 2025 Pride of Longbridge Show ​Photo Gallery
      • 2025 NEC Resto Show ​Photo Gallery
      • 2025 Yorkshire Moors & Coastal Towns Tour ​Photo Gallery
    • 2024 >
      • 2024 BL Autumn Rally ​Photo Gallery
      • 2024 Fabulous Fourth Peak District Tour Gallery Gallery
      • 2024 Glos Vintage & Country Extravaganza Gallery
      • 2024 North Devon Tour Photo Gallery
      • 2024 NEC Restoration Show Photo Gallery
      • 2024 Norfolk Tour Photo Gallery
      • 2024 Coal in the Valleys Photo Gallery
    • 2023 >
      • 2023 NEC Classic Motor Show Photo Gallery
      • 2023 Fat Lamb 3 Tour Photo Gallery
      • 2023 Warwickshire Tour Photo Gallery
      • 2023 Lucas isn't bored Photo Gallery
      • 2023 Gar's birthday tour of Devon Photo Gallery
      • 2023 Shropshire Tour Photo Gallery
      • 2023 Anglesey & Snowdonia Tour Photo Gallery
    • 2022 >
      • 2022 Classic Motor Show Gallery
      • 2022 Fat Lamb Tour Gallery
      • 2022 NC500 - the Grand Tour of the Scottish Coast Photo Gallery
      • 2022 Glos Vintage & Country Extravaganza Gallery
      • 2022 Best of Yorkshire Tour Gallery
      • 2022 Peak District Revisited Tour Gallery
      • 2022 Gaydon Weekend Gallery
      • 2022 NEC Resto Show Gallery
      • 2022 Forest of Dean Winter Tour Gallery
    • 2021 >
      • 2021 Classic Motor Show Gallery
      • 2021 Fat Lamb Tour Gallery
      • 2021 Welsh Tour Gallery
      • 2021 Jurassic Coast Tour Gallery
      • 2021 Crich Museum & Tour Gallery
      • 2021 Staffs Oatcake Tour Gallery
      • 2021 Boston CCC Show Photo Gallery
    • 2019 >
      • Yorkshire Moors Driving Tour 2019
      • Lancaster Insurance Classic Motor Show NEC Nov 2019
      • New Forest Driving Tour 2019
      • Gloucester Vintage & Steam Extravaganza Photo Gallery 2019
      • Tour of the Dark Peak Photo Gallery 2019
      • Codgers do the Cotswolds 2019
      • Bubble Car Museum Gallery 2019
      • Brecon Beacons driving tour 2019
      • Morgan Factory tour 2019
      • Practical Classics Classic Car & Restoration Show 2019
    • 2018 >
      • Lancaster Insurance Classic Motor Show NEC November 2018
      • Isle of Wight Tour 2018
      • Brunel's Somerset Tour Gallery 2018
      • Gloucester Vintage Extravaganza 2018
      • Maesteg Charity Classic Car Show & Driving Tour 2018
      • Bubble Car Museum & Driving Tour 2018
      • Peak District Driving Tour 2018
      • Practical Classics Classic Car & Restoration Show 2018
      • Coventry Transport Museum 2018 >
        • Joel Lodder's 2018 Coventry meet gallery
    • 2017 >
      • Lancaster Insurance Classic Motor Show NEC November 2017
      • Snowdonia Driving Tour 2017
      • Gloucester Vintage Extravaganza 2017
      • Lupin Farm Charity Car Show 2017
      • The Shackleton Trust 2017
      • Crich Tramway Museum 2017
      • Bubble Car Museum 2017
      • Pride of Longbridge 2017
      • April 2017 Practical Classics Restoration Show (NEC)
    • 2016 >
      • Crich Tramway Museum 2016
    • 2015 >
      • Bubble Car Museum 2015
      • Coventry Transport Museum 2015
  • YouTube
  • Insurance
  • Shop
  • Mailing List
  • Contact
  • Join
  • About

blogs

Categories

All
Alan Warwick
Andy Perman
Anthony Osborne
Austin Mini
Brett Richardson
Brian Allison
Brits Abroad
Callum Tooey
Classic Motor Show
Daniel Bysouth
Drive It Day
Eddy Glass
Eric Dalton
Focus On British Classics
Gar Cole
Graeme Moore
Graham Hemsley
Group Events
Group Tours
Gus Brooks
Holly Bush
In The Workshop
Jim Lodder
Joel Lodder
John Lonergan
John O'Cean
John Simpson
Kevin Thompson
Mark Smith
Matthew Homburg
Members Classics
Members Recollections
Mick Masters
Mike Peake
Nicholas Webb
Nick Arthur
Nigel Hughes (Vauxhall Cavalier & Chevette Club PR)
Paul Sweeney
Projects
Steve Favill
The Weekly Groan
Tony "Tosh" Brooks
Unsung Heroes
VLOG
YouTube

Archives

April 2025
March 2025
February 2025
January 2025
December 2024
November 2024
October 2024
September 2024
August 2024
July 2024
June 2024
May 2024
April 2024
March 2024
November 2023
October 2023
September 2023
August 2023
July 2023
June 2023
May 2023
April 2023
March 2023
January 2023
December 2022
November 2022
October 2022
September 2022
August 2022
July 2022
June 2022
May 2022
April 2022
March 2022
February 2022
January 2022
December 2021
November 2021
October 2021
August 2021
July 2021
June 2021
May 2021
April 2021
February 2021
December 2020
October 2020
September 2020
August 2020
July 2020
June 2020
May 2020
April 2020
November 2019
October 2019
September 2019
August 2019
July 2019
June 2019
May 2019
April 2019
March 2019
February 2019
December 2018
November 2018
October 2018
September 2018
August 2018
July 2018
June 2018
May 2018
April 2018
March 2018
February 2018
January 2018
December 2017
November 2017
October 2017
September 2017
August 2017
July 2017
June 2017
May 2017
April 2017
March 2017
February 2017
January 2017
December 2016
November 2016
September 2016
August 2016
June 2016
May 2016
April 2016
March 2016
February 2016
January 2016
December 2015
Two Fatblokes paint a 1961 Fisher Holivan

7/3/2022

9 Comments

 
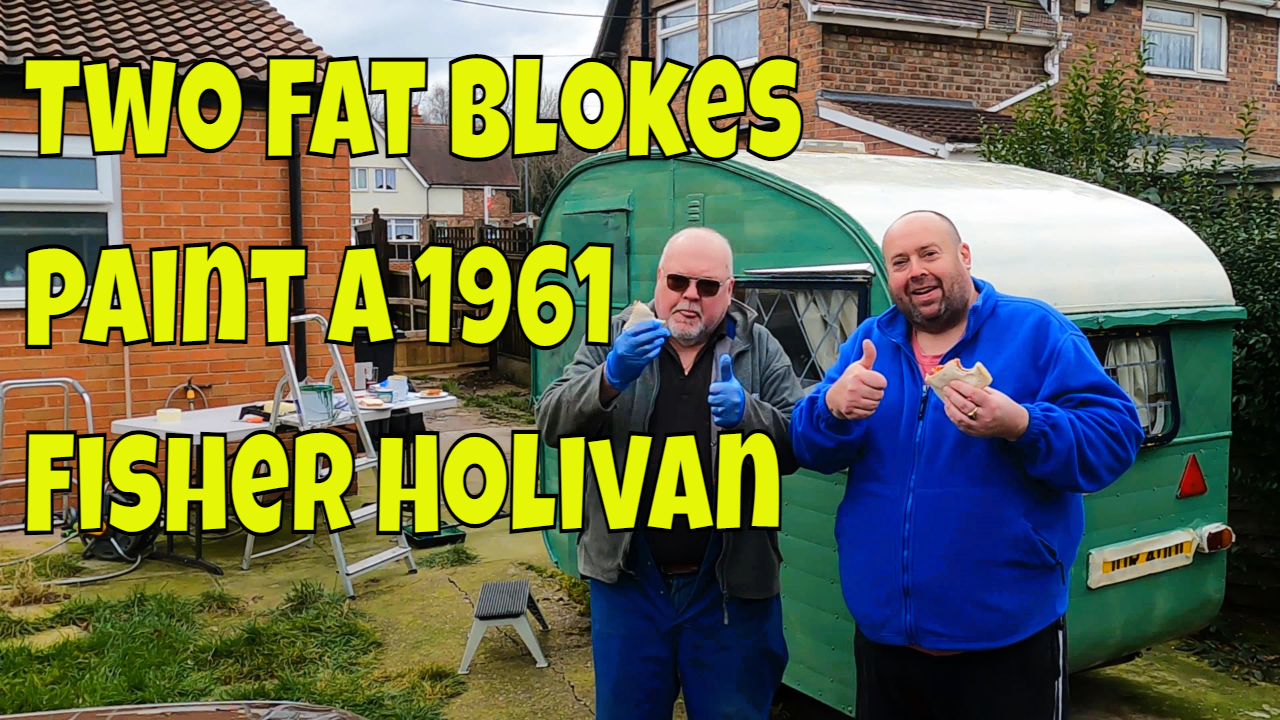
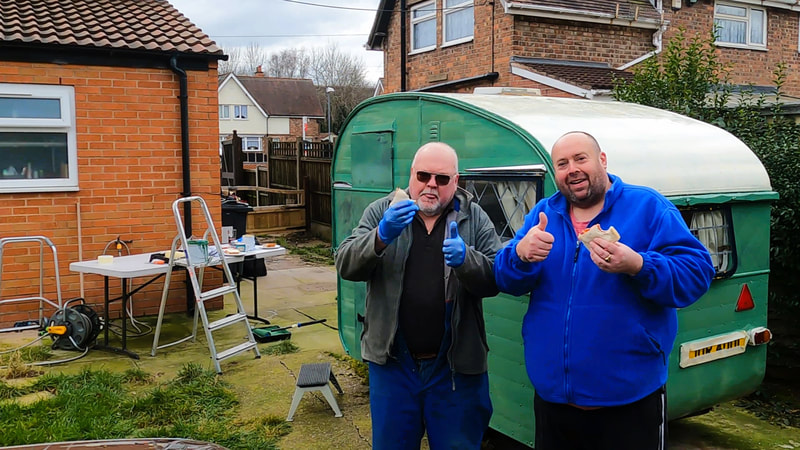
"Two fat blokes paint a 1961 Fisher Holivan" is a timelapse video in the style of the silent comedies from years ago and stars Gar with Ian who agreed to help paint the Holivan ahead of its planned starring role on the group's stand for the Practical Classics Classic Car & Restoration Show at the NEC later this month. ​
Gar was given this 1961 classic caravan by his brothers father in law. It is totally charming and ridiculously is a mere 8ft long by 5ft wide. It had been stored in a barn since 1985 where it was used as a changing room by young horse riders.

​It was in dire need of restoration when it was put into the barn but being stored out of the weather in the dry for the last 30 years saved what was left of it. With the previous owner being a typical car hoarder and now downsizing his collection, the caravan together with several cars waiting for restoration all went to new homes as it became obvious that they were never going to be 'gotten around to'.

Started by Les and Alex Fisher in Walton-on-Thames in Surrey, England in the 1950’s, L. & A. Fisher Ltd originally undertook caravan repairs. Sometime between 1960 and 1962, they began manufacturing their own Fisher branded caravans. All Fisher caravans were handmade by craftsmen in these two factories except the chassis, which in later years, came in from an outside supplier.

​Fisher became known compact touring vans; vans as small as 8ft long x 5ft wide were produced in the 1960s, designed to be towed by the smallest of British cars of that time. The Holivan Junior weighed in at around 550lbs and cost a mere £197. There are now known to be fewer than 20 of them left in the world.
9 Comments

Reliant Rialto 2 Restoration Part 4

20/9/2017

0 Comments

 
by Kevin Thompson
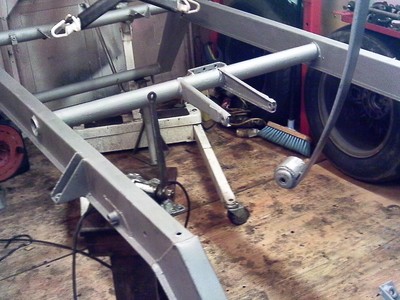
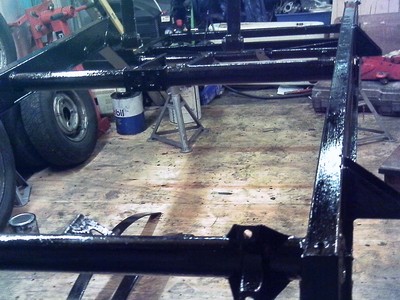
We left off in part 3 with the chassis being painted then rubbed down and under coated then painted in black gloss - still just as good though.
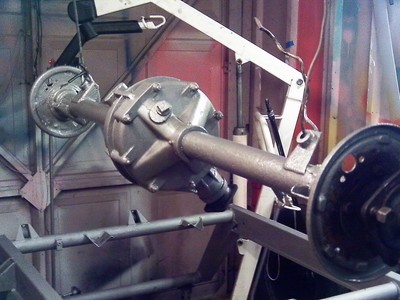
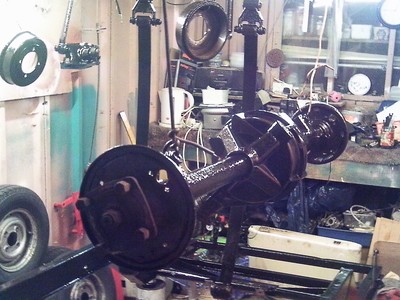
Then I started on the back axle and all the wheel hubs and the shockers too with springs as well I went to on them all even the front A Frame as well!
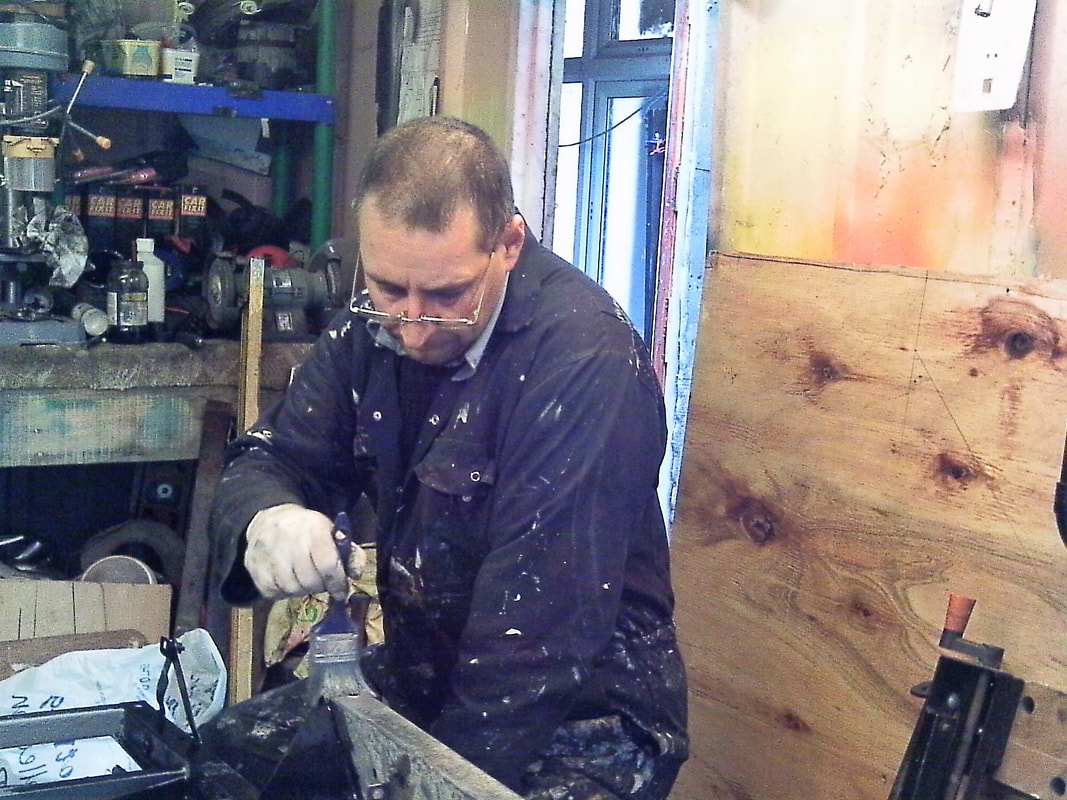
In the next picture there's a guy who painted it all. I don't know who he is though lol but he was pretty good, so I let him paint the whole lot - saved me a job!
Picture
'On the job' .... settle down at the back!
Picture
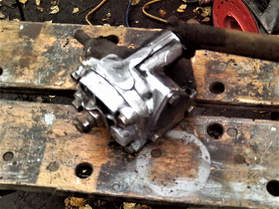
After all that was done, I started to refurbish the steering box as it was weeping a bit and we cannot get another one any more as they don't make them.

If they did it would cost a fortune. Even today the second hand ones can cost around £150/200 but luckily I have 2 spares and they are mine! lol


​I might sell one - we will see - so it got a good clean and instead of oil in it I packed it with grease so it won't leak any more as they do fail in the MOT with leaks or weeping.

After all the cleaning and painting I left them all to dry. I had if I remember left them for a few days to really dry out ready for reassembly. That was done over a few days, rebuilding all with new shiny wimy parts and after a few days I had a rolling chassis again ready for the body to be put back on!

In part 5, I make a start on the Reliant's body 
​
More by Kevin
0 Comments

The Apollo Story - Part 6

25/2/2017

1 Comment

 
by Tony "Tosh" Brooks
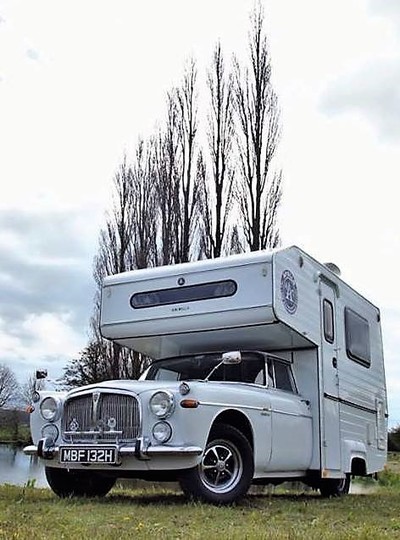
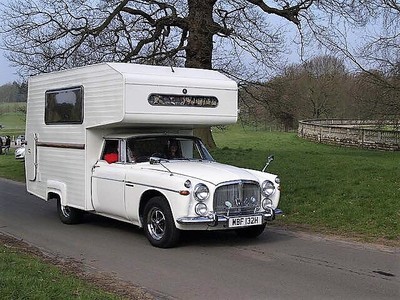
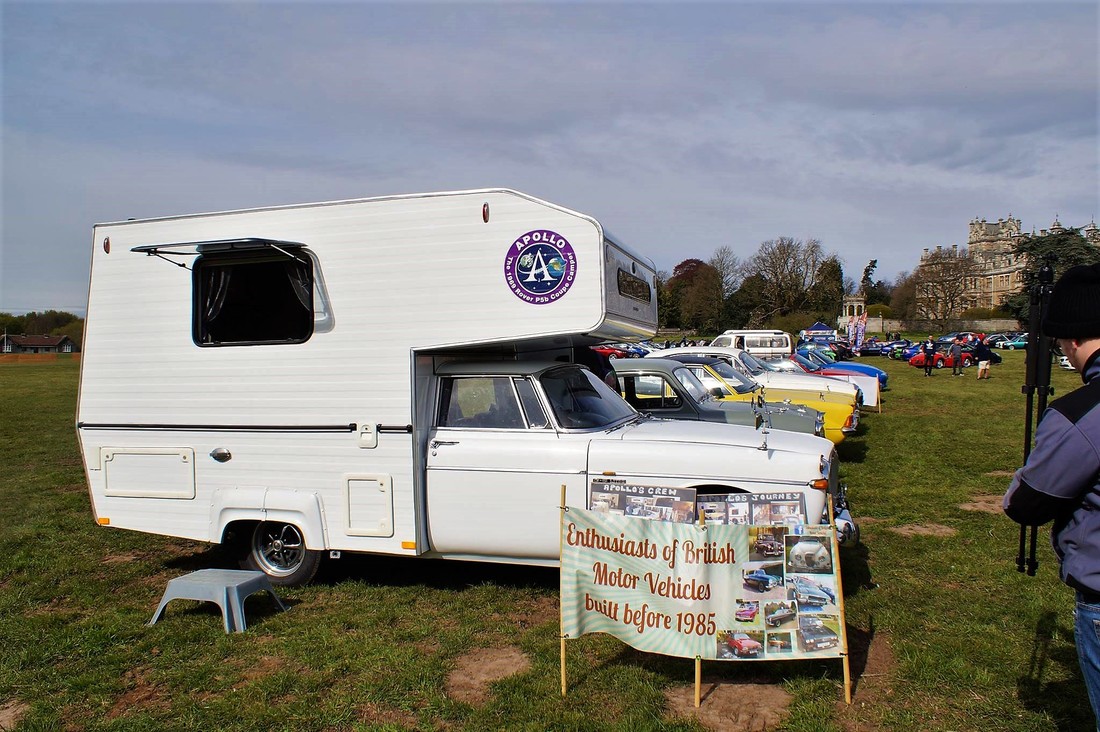
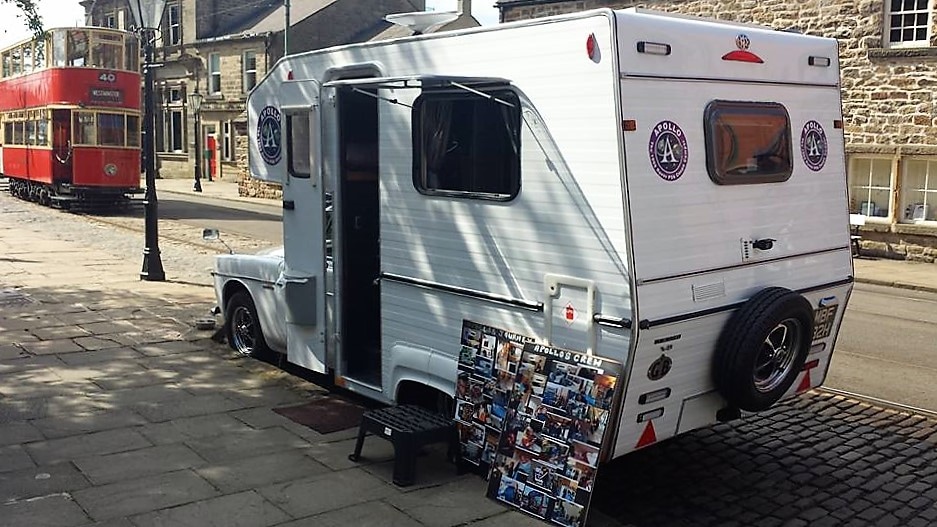
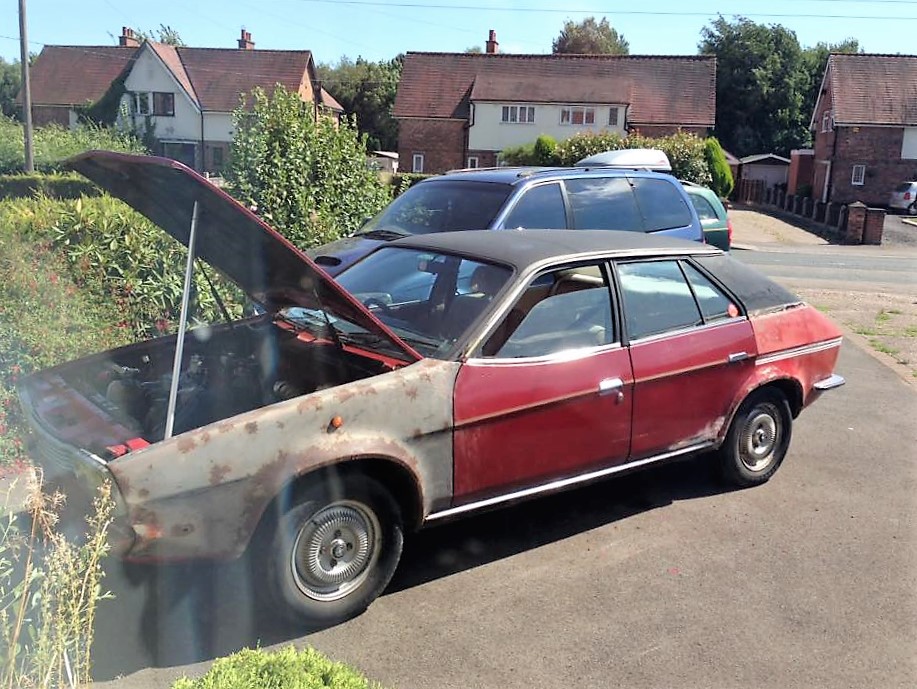
  • “Apollo” The 1969 Rover P5b Coupe 3500cc V8 Auto Camper
  •  Registration Number MBF 132H
  •  Owners/restorers: Tony “Tosh“ & Alison Brooks, Garry “Gus” Brooks.
  •  Special thanks along the way to family helpers Tim Brooks, Claire, Carl & Tim Wilson, Julie & Mike Brooks, Kurt Lawrence

Looking back

I’d like to say it has been a complete pleasure to restore this unique and interesting vehicle, but it was a summer of hard work and vast expense that caused a few arguments and lots of heartache along the way!
Picture
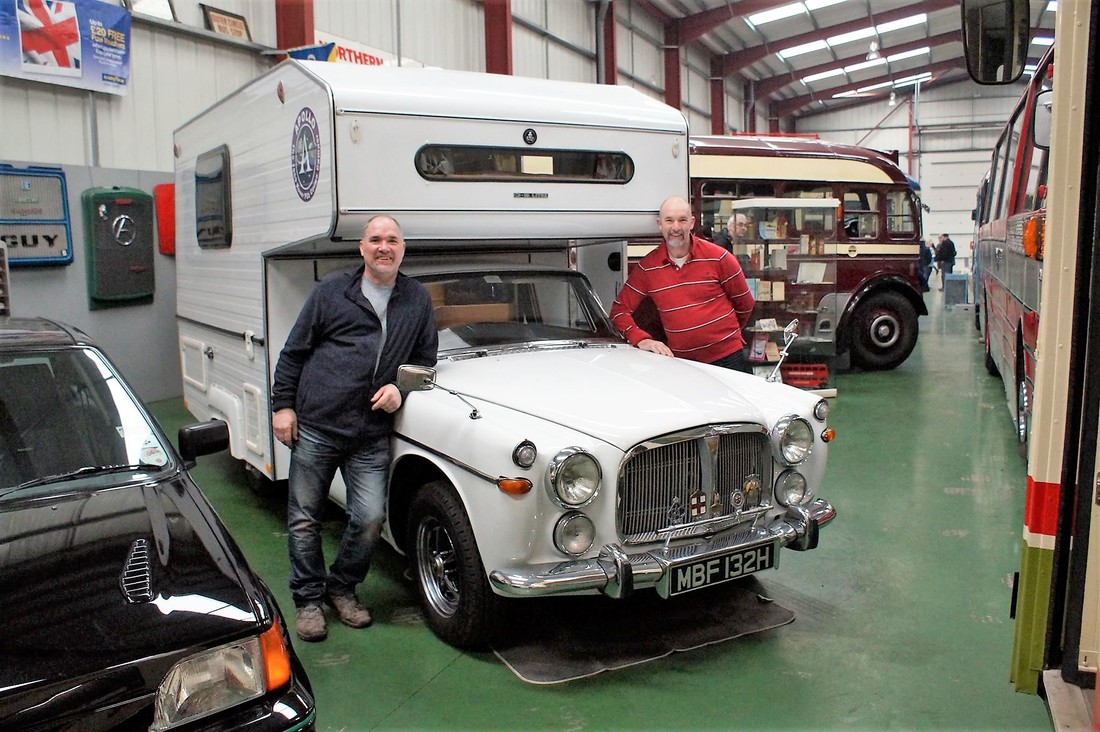
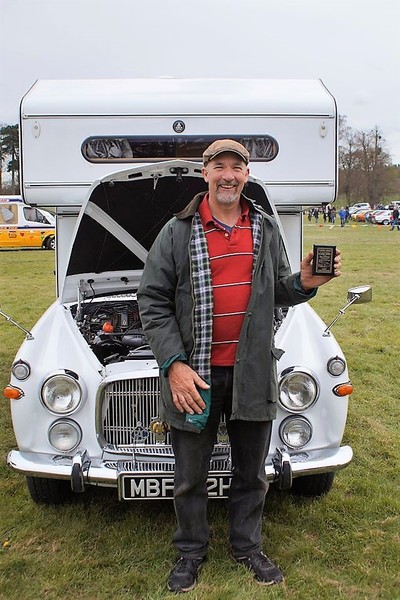
Tosh and Gus with Apollo
We all love it (despite what Alison may say from time to time!), and can’t wait to get back out on the classic car show circuit in 2017, starting of course at the NEC at the beginning of April. I don’t think Apollo will ever be totally finished; as with all classics it’s an ongoing project, but we’re happy with where we are now and will continue to improve and change things as we go.
 
I apologise if I’ve gone on a bit, but I can assure you I have condensed a lot of the work involved in getting it this far, and I apologise if I’ve missed anyone or any parts of the restoration out. Your help and hard work was much appreciated and I hope we all get to enjoy using Apollo for many years to come.

History before our ownership

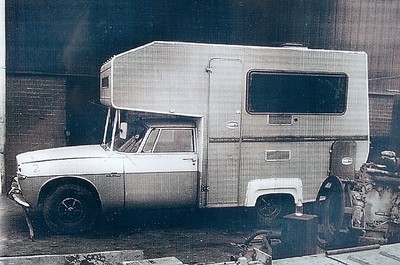
First registered in 1969 this Rover P5 Camper was sold to it’s second of 4 registered keepers in 1971, and he took the unusual decision to mount a one off hand built caravanette frame on to the chassis. So the original car was just two years old and perfectly straight when it was cut in half! The conversion was obviously a success as he enjoyed many years of touring in the West Country and extensively on the continent with his family.
 
History is lost for a while, and it’s believed the car fell into disrepair and was off road for quite a while, before it was discovered by a Rover enthusiast and his life long friend decades later.
 
Sadly however, having purchased the vehicle in 1996, after finding it dumped and forlorn in a sand quarry, the current owner quickly established that the caravanette structure had succumbed to the rigours of corrosion and wood worm and needed to be rebuilt. The gearbox was missing too, so maybe this is why it ended up where it did for so long.

The framework, ceiling and most of the cladding was replaced and resprayed and it seemed an ideal time to modernise the interior and kitchen area. The wiring was also brought up to date, enabling the lighting to be run from a 12v or 240v supply. A new gearbox was sourced and fitted as well as complete restoration of the front bodywork and chrome.

Having owned the vehicle for 19 years, the interior has since been redecorated a couple more times, but as the owner got to an age where maintaining the vehicle no longer possible, he decided to sell it on at the Silverstone auction at the NEC Classic and Restoration Show in 2015.
​
During his ownership he enjoyed many years showing the car and attending the London to Brighton Classic runs from 1999 to 2014! It was a well known and well respected vehicle on the show circuit, and is believed to be the only surviving camper based on a Rover P5.

Picture
L-R younger brother Tim, me, older brother Gus
If anyone needs any further information, or has any ideas or advice on further improvements we could make, or shows and events we could attend, we are open to any suggestions.

Any readers who would like to know more about Apollo may enjoy our Facebook page here: www.facebook.com/RoverP5Camper

I hope you enjoyed reading my account of the Apollo journey to date - do come and say hello if you visit the NEC this April.

Tony "Tosh" Brooks

More by Tony
1 Comment

The Apollo Story - Part 5

24/2/2017

0 Comments

 
by Tony "Tosh" Brooks
  • “Apollo” The 1969 Rover P5b Coupe 3500cc V8 Auto Camper
  •  Registration Number MBF 132H
  •  Owners/restorers: Tony “Tosh“ & Alison Brooks, Garry “Gus” Brooks.
  •  Special thanks along the way to family helpers Tim Brooks, Claire, Carl & Tim Wilson, Julie & Mike Brooks, Kurt Lawrence

into The home straight

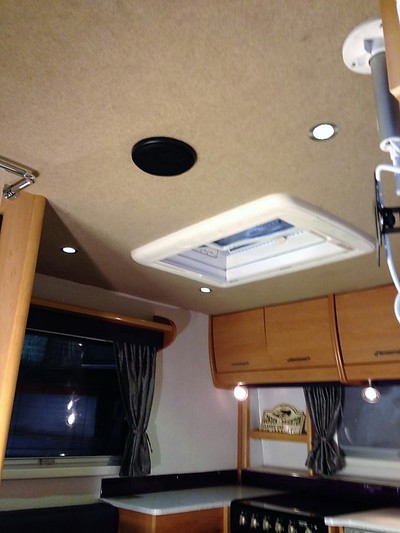
It was then onwards and upwards with fitting the external locker doors, entry door, toilet access and flush fillers, side windows, marker lights, sunroof, tv aerial, roof vent, etc, to the body, and we had a set of fancy led rear lights, rear view camera, new number plate, rear window and the spare wheel carrier to fit to the back end.
Picture
​We deliberately wanted people to see the car from the back and be confused as to what it was. Is it just a regular, modern type caravan or motor home or what? So we fitted high and low rise led stop and tail lights & indicators, led fog & reversing lights and a high rise brake light, as you’d find on modern vehicles. Then with the old style registration plate and the spare Rostyle wheel hung on the back, along with the V8 3500 badges, it would make people realise this was no “ordinary” motor home!
 
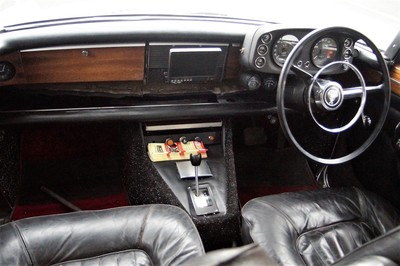
My younger brother Tim had been hard at work, he had taken all the wood pieces from the cab interior, as well as all the chrome trims and door cards home and set about bringing them all back up to a beautiful finish, fit to go back on the car. He flatted, repaired and re-varnished the wood. Polished up the chrome trims, bumper and grille, and re-trimmed the door cards and dash parts with new black vinyl and velour, and fitted new fur flex trim and rubber door seals.
 
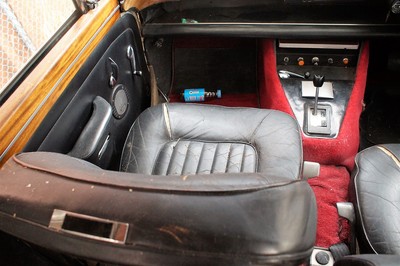
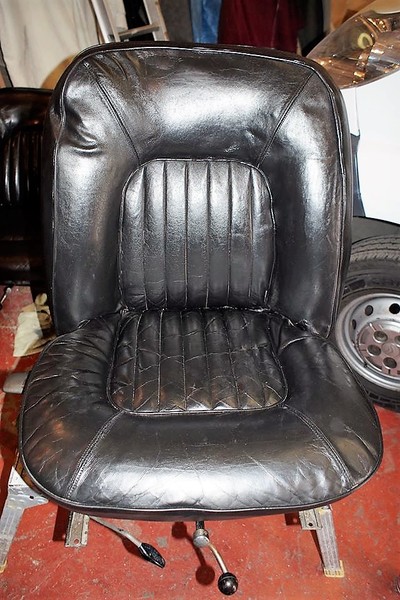
My wife Alison spent hours stripping down the front seats, re-stitching the splits, fitting new padding, feeding and colouring the leather and building them back together, and did a fabulous job of saving what I thought were a pair of seats beyond all repair!
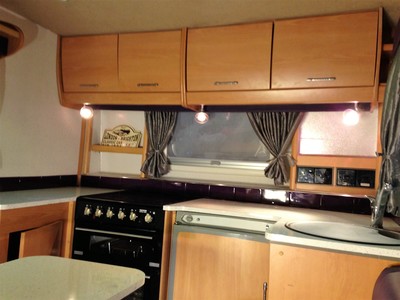
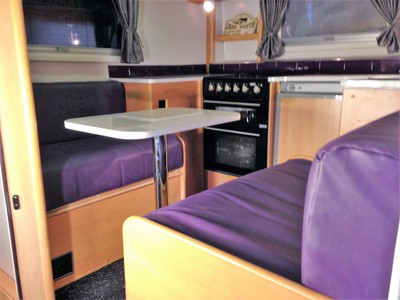
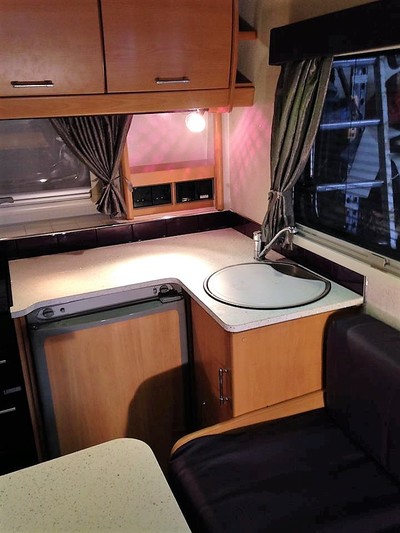
Her next task was to make the seating, curtains and pelmets for the rear interior, as well as helping to carpet line the ceiling, and paper the walls. She had free reign with the interior design, and to go along with the Apollo theme of stars and glamour, she came up with black glitter carpet on the floor, silver grey curtains, and fabulous purple faux leather for the seating and pelmets. The seating then went one stage further with big diamante buttoning! It looks amazing and certainly not what people expect to see in a 60’s motor home!
 
I fitted a Truma gas and electric water heater, and fresh water tank with pressurised water flow system, which would pump hot or cold water to the smart round kitchen sink and bathroom basin. A 3 way fridge freezer and full cooker with 4 ring hob, grill and oven. The gas bottle is housed at the nearside rear and accessed from an external locker. The external locker on the off side houses the car battery and the leisure battery to run the 12v system, which is then connected to a 100w solar panel on the roof which is split switched so we can trickle charge either battery at any time. There’s a 240v hook-up too, connected to the mains consumer unit, and we have several mains sockets throughout, and can run the water heater and fridge on mains, as well as re-charge the leisure battery when hooked up.
 
We had smart bespoke worktops made in a glittery white laminate and tiled the kitchen area in purple and white lightweight tiles with chrome trims, which really finish off the look.
 
With the interior starting to look the part we needed to add some “in car” entertainment, so I added a 12v tv/dvd player on a wall bracket next to the entry door. It is the perfect position to watch tv from the rear seating area or whilst laid on the over cab double bed! The tv connects to a Status telescopic aerial on the roof with signal booster. Then I fitted a cd player connected to two ceiling mounted speakers which also double up for the cd player in the cab, as we didn’t want to put speakers back in the new door cards.
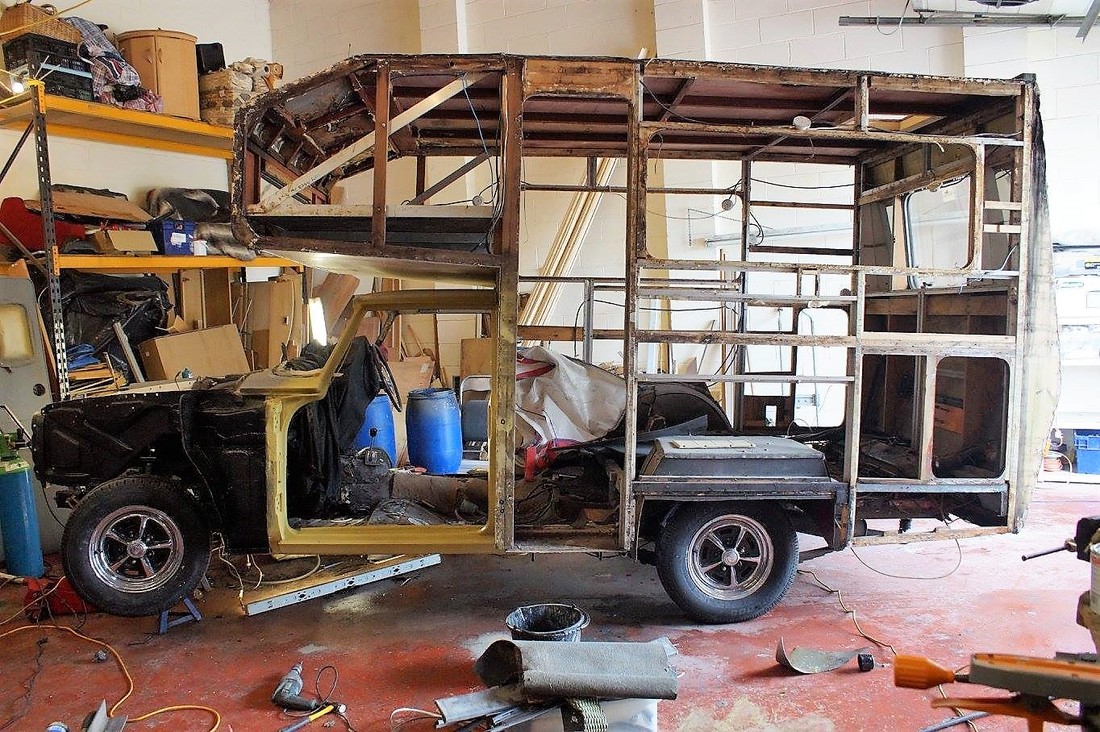
Overall, the only thing that we ended up using from the original camper is the main aluminium frame and the wood roof frame, which apart from a bit of rotten wood that needed replacing, was in pretty good shape, and the plastic wheel arch covers. Everything else is new, and although it looks similar to the original, if a picture of the before and after are put together, you will see they are quite different.
 
It’s quite obvious the rear end view is totally different with the new lights etc, but the sides look similar until you notice on the nearside, the window in the entry door, the curved led awning light, the gas locker door and the smaller side window, as well as the water tank filler, and the water heater exhaust outlet.
 
On the offside, apart from the smaller window, the differences are the toilet cassette access door and flush inlet, the fuel filler cap, the battery box door and hook-up inlet.
Next time - Tony reflects on the restoration and what he knows of Apollo's past
More by Tony
0 Comments

The Apollo Story - Part 4

23/2/2017

0 Comments

 
by Tony "Tosh" Brooks
  • “Apollo” The 1969 Rover P5b Coupe 3500cc V8 Auto Camper
  •  Registration Number MBF 132H
  •  Owners/restorers: Tony “Tosh“ & Alison Brooks, Garry “Gus” Brooks.
  •  Special thanks along the way to family helpers Tim Brooks, Claire, Carl & Tim Wilson, Julie & Mike Brooks, Kurt Lawrence

The refurb continues ...

The heavy plywood floor was ripped out and refitted in lighter timber after laying the first fix wiring etc for the 12v and 240v electrical system.
 
Every piece of internal board was torn out as it was all rotten, damp and smelly, and it needed to be properly insulated anyway. This allowed me again to run first fix wiring for the ceiling lights, cd speakers, and tv wiring etc. A large sunroof was cut into the roof, to allow more natural light in than a standard roof vent, and any rotten wood in the main frame was replaced with new stronger timber.
Picture
I had some really smart double glazed caravan windows, which came with built in internal concertina blinds and fly screens; luckily they were just the right size for the sides. They would allow me room to fit the overhead lockers, and TV bracket etc without getting in the way.
 
Alison insisted that we had to have a toilet and wash basin as part of the interior build. If we go to long weekend classic car shows and the like you can’t beat having your own private facilities, and after many years experience of caravan and camper outings, I just had to agree. So the only place I could possibly fit this was directly behind the drivers seat. This meant re-siting the main car battery, which was presently fitted right where the closet floor needed to be! It would be “cosy” but functional and well equipped, with an electric flush cassette toilet and hot and cold water corner wash basin with mixer tap.
 
The petrol tank was protruding through the floor at the rear, and this had to be removed in order for me to be able to put the fridge and oven in position later. There was plenty of room under the chassis to fit a different tank, and we ended up fitting a brand new Land Rover one, which worked out really well; it had the capacity we needed and the filler pipe was exactly where we needed it to be.
 
While I was busy with the rear build, Gus had re-built the engine and fitted the new gearbox to it. It looked like a brand new motor with everything cleaned, polished and painted. We were ready for a bench test so he fitted the radiator, and ran a fuel line from a can, then connected a battery. After a few false starts, it fired into life and sounded awesome without the exhaust fitted!!
 
Unfortunately this was when we noticed the radiator was leaking from several places, so rather than messing around trying to seal it, we ordered a brand new one, which would have a modern core and help greatly with any future over-heating issues. With that and the new Kenlow electric fan, we were confident it would be one less thing to worry about when travelling long distances.
The front sub frame and cross members etc were all under sealed and painted before dropping the engine and box back in. The exhaust was new, the manifolds were sand blasted and re-painted, we had a full set of new gaskets, so it was all pretty straight forward and looked 'the business'.
 
We read that the vague steering could be much improved by altering the caster angle, and swapping the rubber sub frame mounts for solid ones, so we had some new mounts made and some spacers and longer pegs to alter the caster angle. As it turns out it now steers 100% better, and feels much safer on the road.
 
Finally the new roof and siding material was delivered, after a much longer wait than we expected. This allowed me to get the paint matched to the colour of the side panels, and also to get on with top coating the front end body panels. Although my work unit is by no means ideal for spray painting, the final finish wasn’t bad and we were very pleased with it. I used two pack paint so this allowed me to flat off and polish up any slight imperfections and rub the flies out!
 
The next job was to fit the sides which was pretty straight forward, and we had hoped to drop the roof panel on in one continuous 7m length, but this proved too tricky and awkward to handle. We ended up having one cut on the underneath part above the car roof and another cut on the top front curve, as it was too sharp a bend to carry it all the way over the rest of the roof. The joints were are properly sealed and trimmed with aluminium mouldings so hopefully we wont have the same water ingress issues in future.
 
One of the hardest jobs was mitreing the corner mouldings. With all the different angles, each section had to be slit and curved to follow the contours of the body. It took for ever to get (almost) perfect, but we were happy enough with it, and with the black moulding inserts fitted it looked very neat.
Next time ... the work continues!
More by Tony
0 Comments

The Apollo Story - Part 3

22/2/2017

0 Comments

 
by Tony "Tosh" Brooks
  • “Apollo” The 1969 Rover P5b Coupe 3500cc V8 Auto Camper
  •  Registration Number MBF 132H
  •  Owners/restorers: Tony “Tosh“ & Alison Brooks, Garry “Gus” Brooks.
  •  Special thanks along the way to family helpers Tim Brooks, Claire, Carl & Tim Wilson, Julie & Mike Brooks, Kurt Lawrence
​I could go on for hours listing everything we’ve replaced, mended, up-graded, re-built etc, but needless to say it would be a lot quicker to list the parts that haven’t been replaced!
Picture
We stripped the engine and gearbox out, and sourced a second hand replacement box. The engine was totally re-built from top to bottom, and now purrs like a kitten. Every ancillary was cleaned, replaced, sand blasted, powder coated or painted before being re-fitted.

The electrical system was over-hauled, so everything worked as it should. We fitted a new speedo and cables, choke cables, kick down cables, and any other cable we could find. Every hose, every clip, every gasket, every bush, every joint, everything.

 
While the engine was out we prepared and re-painted the engine bay. Not to concourse standard but good enough for us. This was after all going to be a car that we would use, and not just be for showing off.
 
Gus welded the inner wings, the wheel arches, the inner and outer sills, the floor pans etc, which were pretty bad I places, but there was good metal to weld to, so we knew it would be good and strong for years to come and get through a proper mot this time!
 
While he had his welder out, he also welded new wing bottom repair panels, door bottom panels, and A-post repair pieces etc, so the body panels could be prepared ready for painting.
 
By the this time the rear “camper” part was still as it was, ready for a “light” renovation further down the line, but that wasn’t to last!
 
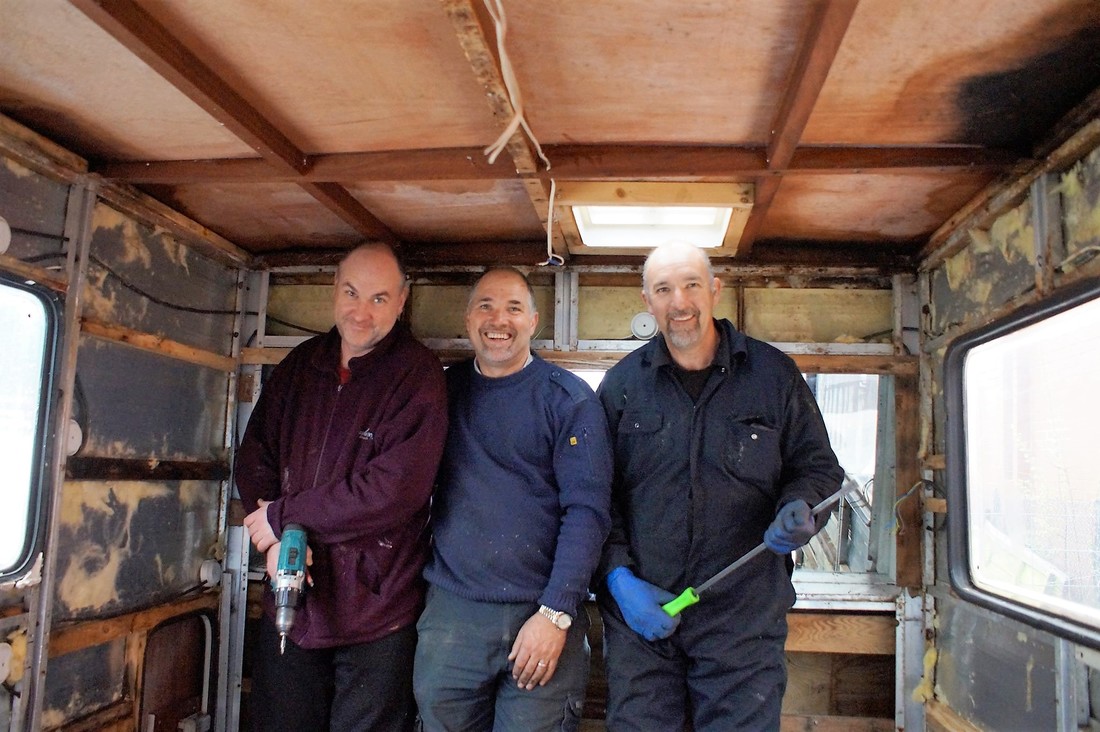
We had a couple of good “family” weekends, where my daughter Claire and her husband Carl, and Gus’s kids Julie and Mike, and Julie’s fiance Kurt came down and helped us gut the camper interior as it was well rotten, damp, heavy and old fashioned.

We wanted to fit a modern interior, with all the mod cons of a modern motor home, and get totally away from the “Old Lady” flowery, 60’s retro look that everyone would expect to see in a conversion like this, so everything had to go!

 
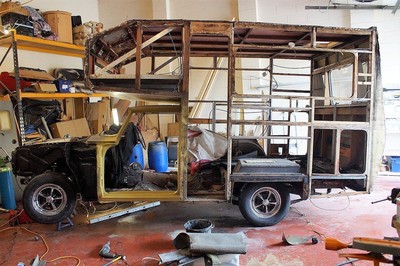
We were hoping to save the external sidings and the roof, but when we got on the roof we realised the previous owner had poured gallons of tar over the roofing sheets, in the vain hope of stopping water ingress to the interior. So Carl set about stripping all that off, and obviously that lead to stripping all the corner trims off, and the broken roof light off, and before we knew it there was not much left!
 
With the roof panels off we started to look at the rest of the aluminium sidings; they were dented in several places and the hand carved wood trims weren’t really our style. The side windows were far too long and were going to restrict building the interior as we wanted.

The entry door needed to be re-built, and a new window fitted. The gas locker door was a big heavy thing that would ultimately be in the wrong place in our new design, and the original fridge vents were in the wrong place too. So the decision was made to strip the whole thing back to the bare bones and pretty much start again.
We were working on it outside in our yard up to this point, as the weather was pretty good through March into April. Then as I was slowing down a bit on my own job and had space in my unit we managed to bring it inside before the rains came, ready for some paintwork and moving forward with the camper re-furb.

All the body panels had a coat of sealer and several coats of primer, and the engine bay was painted ready for the engine & box to go back in. The windscreen rubber seal needed to be replaced, so the screen was taken out before preparing the roof and scuttle for paint.
 
We’d ordered the new sidings and roof panels from Eltheringtons in Hull, and these were coming pre painted white, so we had to wait for delivery before we could order the two pack paint for the body, as we wanted it to colour match perfectly.
 
While waiting for the delivery we got on with re-building the rear wheel arches, as they were far too high and a complete bodge of wood and fibreglass. Gus fabricated nice solid sheet metal arches, which would be fully water proof, and could easily be insulated from the inside. 
Next time - the restoration continues
More by Tony
0 Comments

How not to buy a classic car - part 3 (or 50 shades of primer)

28/9/2016

0 Comments

 
by Gar Cole
Part 2 left off with myself on a high having steered the wedge through its MOT with no advisories,  our group meet at Cosford loomed just a week later,  having just had the suspension fluid changed and pumped back up I looked forward to the 30 mile drive. 

I was awoken the morning of the show by rain splattering against my windows,  cursing our bad luck at yet another wet event I none the less set off armed with umbrella and my RAC breakdown card.

To give the old girl credit she ran perfectly in driving hard rain,  blower kept the windows clear and me warm,  fearing I'd be the only member to show up I was pleased to see David Aikman and his Cortina GT follow me around the island as we left the M56,  we were soon joined by 9 other hardy souls and their vehicles.
​
Good natured banter was then exchanged with folks surprised it had made it,  everyone liked it's plush HLS interior but externally she was still an eyesore,  as Mark Wilson so dryly put it 'now I've seen it in the flesh Gar I have to say...... It looks even worse than on the pictures '   ?
Picture
"It looked even worse than on the pictures..."
Determined to try and finish painting the car within a month I stripped out the interior the day following the Cosford show,  Bressingham was looming and I had promised BL Dan Bysouth that I would bring it even if it was in pieces on a trailer,  now the 4 doors, boot and bonnet are in decent condition as they are from a different car that was Zeibarted,  however the original front wings and rear panels were not so fortunate and had more rusty pock marks than a teenagers face. 

​Armed with a cutting wire wheel I started removing the paint from the wings,  filled at first with confidence as the layers of red disappeared followed by primer,  excited as I waited for shiny BL steel to appear for the first time since 1981 I was quickly brought down to earth as the only thing that appeared was pitted rust.
​
Undeterred my amateur enthusiasm carried me on as I continued to sand the rust expecting to reach good steel when I was horrified to see the wire wheel break through the metal,  this brought about an abrupt halt as I asked for advice from my friends at the local body shop,  realising I was out of my depth with panels this badly corroded the job quickly turned to a 'preservation' job to keep the rust at bay for another 18 - 24 months until funds allow for a professional respray.  All 4 panels were liberally coated in Vactan rust remedy before receiving 6 ' yes six'  coats of hi build primer.

Working around the weather and when I had access to the paint booth, I painted the boot and 4 doors first along with the interior bare metal,  I was happy with the results as the last week before Bressingham approached,  however............
​
The 4 original panels were last to be painted, I had flattened down the primer with wet and dry and they looked fine,  I couldn't see any defects in the dull yellow primer at all,  loaded the spray gun up and as the first sweep of black came across the wing it revealed a 'moon scape'  of pits,  grinding grooves and dents I had missed,   it was like witchcraft as every pass of the paint gun revealed more and more defects in the panels,  frustrated and out of time I abandoned painting on the Thursday in order to refit the interior and pack the car Friday morning for the 140 mile drive to Bressingham in deepest , darkest Norfolk.
The nice drive to the countryside turned into a 5 hour ordeal with 10 mile tailbacks on the A14,  however Princess Okk1 didn't miss a beat until the last 20 miles when I lost hydraulic pressure in the clutch,  feeling more like a banana than a clutch pedal I nursed the gearbox with double de-clutching through pitch black, windy and wet Norfolk roads until the campsite loomed into view,   yesssss we made it,  thank you old girl.

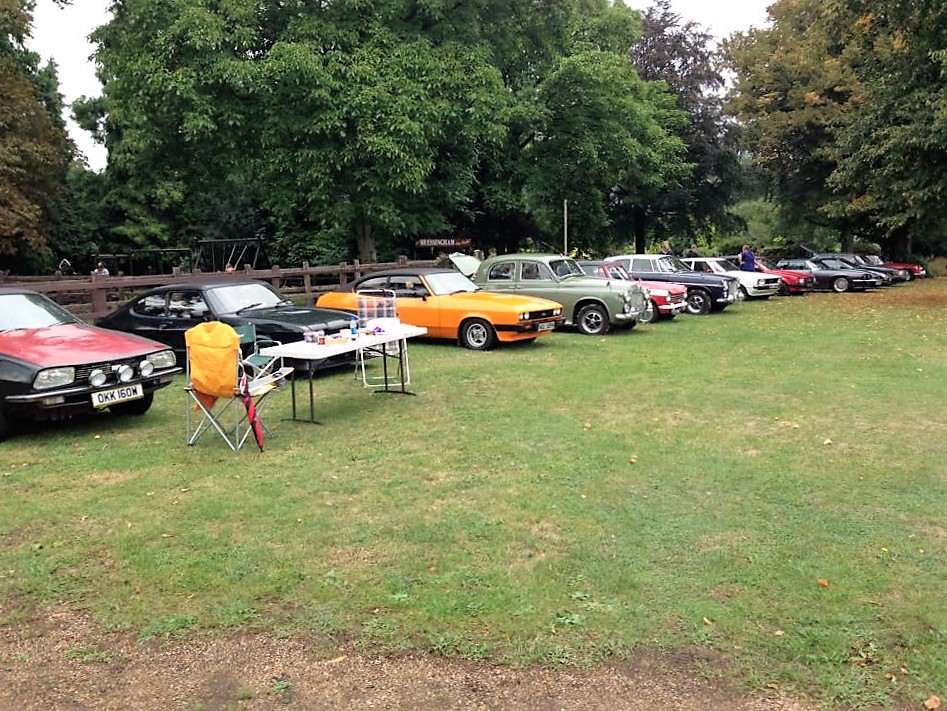
The following morning I was assisted by Mike Peake,  Phil Allin and Keith Lloyd who had my clutch bled and working within 5 min before we  set off for Bressingham steam museum,  I loved being part of a classic convoy ' it was my first '  and we certainly turned a few heads.
​
After a very enjoyable weekend camping the wedge was loaded up for the trip home to Sutton Coldfield,  a trouble free 50 miles at a steady and smooth 60mph came to a spluttering halt at Kettering services,   now it was at this point that the difference between breaking down in a classic compared to a modern car became clear,  within 30 seconds group member John Hone pulled up behind me in his modern car,  bewildered at his sudden appearance he sheepishly admitted he was lost and had spotted me on the A14 and had decided to follow me home,  his crafty plan foiled by my breakdown,  he very generously offered to wait until the RAC arrived but I let him go armed with directions back to the M1. 
Picture
Bressingham at last!
While awaiting rescue I updated my situation on the group to pass the time,  within 10 minutes another modern car arrived carrying group member Mark Finney,   they had been to a beer festival but diverted to check on me when they realised they were close by,  our group is awesome and so is its members,   the RAC man had the car running again after 5 minutes,  a blocked fuel filter and pipes the culprit,  it seems filling the tank to the brim for the first time in years dislodged a lot of rusty crud,  she then drove home the remaining 70 miles without incident and redeeming herself with many friendly waves and smiles from fellow motorists.

Now I've owned the car for 12 months and had a few trips in her I'm certain of a few things,   I'm smitten with the car and she's a keeper,  the 300 mile Norfolk trip has shown up where more work and parts will be needed over the winter if I want a trouble free season next year,   buying a near parts car isn't for everyone and it's tested me to my limits,  however that is sometimes the only way to get a foothold into classic ownership and it is very satisfying saving a car from the scrap yard.
​
Next week we will return to the paint booth to rectify some of the original mistakes i made and dents i missed, and it will soon go to the specialists in Telford to have all 4 hydro units re gassed with Nitrogen to restore it's  original ride quality,   ongoing project that I'm really enjoying,  updates to come in 2017 ?
More from Gar Cole

If you enjoyed Gar's Blog ...

... please help us keep the group going by supporting us. You can make a donation or buy from our official shop - all profits help keep us on the road.

0 Comments

How not to buy a classic car - Part 2

16/8/2016

0 Comments

 
by Gar Cole
'To the MOT, and beyond'

Having arrived back home with my purchase I endured the usual first 24hrs of the neighbours offering their unsolicited opinions,  much as expected it consisted of stories of build quality, strikes and how Auntie Mabel's gear knob has fallen off hers.  Lesson one of owning a BL car -  let your skin thicken.
Picture
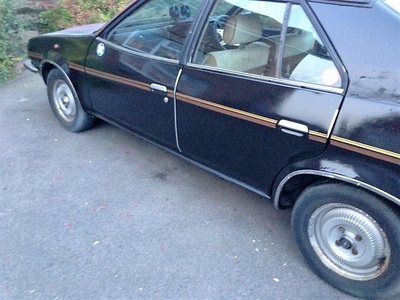
Slightly overwhelmed at where to start on this car I attacked the simple bits first,  a good jet washing removed several years of crud to reveal the true extent of the rust and mismatched panels. A weekend was spent carefully cleaning up the interior and re-pinning the headlining.  It was nice to get out of the car clean instead of dirtier than before you got in,  and under all the dirt the HLS interior was surprisingly nice.

Fortunately for me (and the car)  I have a retired engineer living across the road who is a big help when I get stuck with a car problem,  but even he had a look of trepidation when he clamped eyes on it,  armed with a large pad and pen we attached a new battery and some new fuel hose and clamps to the Princess with the aim of making a list of jobs  that required doing,  gingerly we fired her up as the booming exhaust rattled the windows in the street.
​
What followed I can only describe as being similar to a 'blood splatter analysis'  at a forensic crime scene,  my spotless tarmac drive was dripped on by black spots, brown spots, caramel coloured spots, red spots and even a few rusty bright orange ones, it soon became obvious that most of the seals were about as fluid tight as a chocolate tea pot,  while the two of us were distracted looking at the various oil leaks we failed to noticed the temp rising on the engine,  due to two factors,  the gauge didn't work (more of that later) and neither did the cooling fan which failed to cut in at all,  investigations came to an abrupt halt as the majority of the foul smelling orange radiator water ejected itself from the overflow in a spectacular steamy cloud. 

​'Princess?'  Exclaimed Chris,  'More like a Diva if you ask me'
It soon became obvious that this car required a lot of work (surprise surprise) ,  if I wanted it to be reliable and enjoyable to drive then there could be no half measures,  over the following winter months the head was removed and sent for reconditioning,  I has a custom made exhaust fitted,  carb rebuilt,  alternator and starter motor reconditioned,   all new belts, leads, plugs, distributor, coil, water and oil pumps,  new joints on the power steering pipes,  brake and fuel lines replaced,  new gaskets on the sump and differential housings,  all this took longer than expected due to the prolonged wet winter we have just experienced,  however by March all these parts had been fitted along with a Leyland ST fast road cam I had found at an auto jumble,   still confident I would have it done in time for the Crich  show in May I felt it must be now close to being ready for its mot???     FOOL!

Having now fitted twin cooling fans and a new thermo switch in the rad I felt confident that we would avoid a repeat of the overheating problem,  once again the engine was run upto temperature and I enjoyed a brief drive reversing it back and forth up the drive without fear of explosion this time,  Chris said to me 'what gauges and lights are working?'   Apart from the speedo not a single gauge worked, or any of the warning lights,  heater fan,  interior lights or heated rear window,  totally dead inside,  externally the brake lights didn't work and the sidelights flashed with the hazards.  
​
As I sat there with my head in my hands dreaming of a Rover P5 or MK1 Granada fully restored I tried to reason with myself this was to be expected with a scrap yard car and to not give up,  suddenly I noticed all the gauges had filled up with smoke behind the glass and acrid plastic smoke was coming out of the vents,  I switched off the engine immediately and pulled off the negative lead from the battery as the car slowly filled with smoke.  Sue came out of the house and being a woman not the mince her words pointedly said '  let's hope it keeps burning,  it's an eyesore '   this its fair to say was a low point and I almost gave up, if someone had offered me a few quid for it with the promise of finishing it not breaking it then I would have accepted.

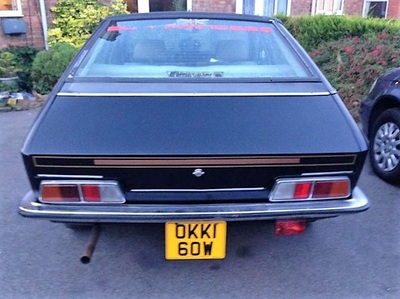
Now I didn't know that OKK 160W is quite 'infamous'  in Princess circles, it has been the subject of several lengthy blogs by previous owners,  one of whom returned it to the road in 2012 by rebuilding it with parts from 3 other Princess models, original it is not,  however the blogs did provide a reference of what had been done 'badly'  to the car during this time, including a complete dashboard and interior change,  having seen how poorly fitted the replacement body panels were I concluded that anything these people had touched would be a 'bodge up' ,  including the non functioning dashboard which had just burnt out,  Crich was out of the question ?.
​
April and May came and went as did the Superb Crich event,  I wasn't in the best of health at that time and lost a little interest in the old Wedge,  however after a holiday away my interest reignited and a professional electrician rewired the dashboard for me,  the fire had been cause by parts of the original loom being cut and reattached with insulating tape during the dashboard swap,  i managed to trace the cross wire that was causing the flashing side lights and a new brake pedal switch fixed those lights, at this time I also relacqured the dashboard and fitted an Astrali 4 spoke wheel I had aquired,   at this point all seemed ready to go,  just 1 week to the Gaydon show on Saturday July 9th it was booked in for mot on Thursday,  just 2 days before so it was tight but I was feeling confident.................................?
​
On the day before mot I noticed oil leaking from the gasket on my fuel pump,  Princess cars should have an electric pump and sender in the tank,  however 'Father Ted'  the previous owner hadn't been able to locate one when the original failed,  so took it upon himself to remove the whole unit from the tank,  take of the blanking plate from the engine and installed a mechanical fuel pump as used on older O series engined cars,  this is the reason my fuel gauge is the sole non working dash item now,  fearing my mot was in doubt I quickly went to the shop Thursday morning to buy a tube of instant gasket,  thinking I had 6 hours before the test I started undoing the bolts holding the pump on ready to reseal it,  as I teased the pump away from the engine the bakalite spacer shattered into 8 pieces with 2 dropping down the opening and into the top of the engine.

ARGGGHHHHHHHHH,  the car is the spawn of Satan I wailed,  needless to say I missed my MOT and the chance to drive it to Gaydon. Despite my crushing disappointment at missing taking it to another of our shows this fault was sorted fairly easily in the following week and after another much needed holiday away from the 'cursed one'  she passed her MOT on Friday 12th August with no advisories.
​
Would I do it all again?   Well ask me after part 3 when the cars been resprayed which is happening over the next few weeks,  will it be trouble free job?  Will I get the front brakes to stop sticking and have the suspension pumped up in time for RAF Cosford in just 4 days time?   Well time will tell.......
More from Gar Cole

If you enjoyed Gar's blog ....

... please support the group by donating or buying from our shop - all profits help us to keep the show on the road.

0 Comments

How not to buy a classic car - Part 1

14/8/2016

0 Comments

 
by Gar Cole
Having only restored 1 car in the past,  a Rover SD1 Vanden Plas V8 EFi that I bought from group member Charlie Badams,  I had fallen into the trap of believing I could take on anything,  trouble is that Charlie sold me a very solid car to start with,  mechanically and structurally sound,  it was mostly basic parts to replace, refit interior and blow it over in the original colour,  it looked a million dollars with much ' back patting ' from all that saw it,  wahayy Gar the super restorer,  fast forward 4 years, the car was sold, I was an admin of this fine group, I had no classic car and I was sat in our apartment in Spain slightly drunk when the phone rang.......
Picture
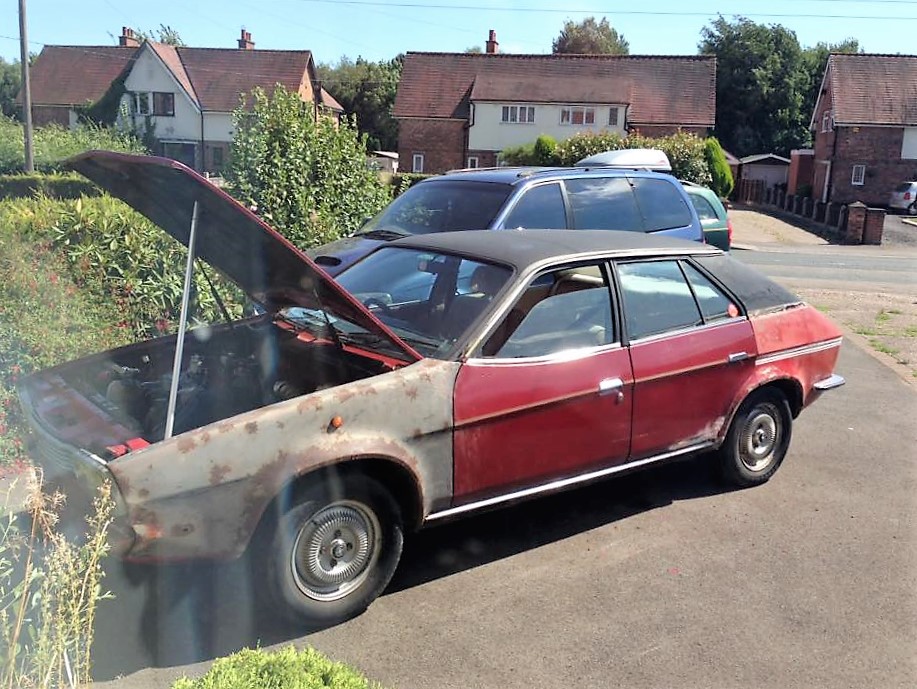
'Alright bro'  came the greeting from my brother in his bizarre Brummie/Dorset hybrid accent,  I was on a farm near Seaton today and saw this Princess,  the old boy indicated he was interested in selling it as it's too much for him to take on.  'Does it run?'  I asked,  'Barely'  came the reply.  'Colour?'   'Well it's sort of red but most of the panels are different shades of it,  that's what I can see of it under the dust, mud and seagull poo'.

I took another good gulp of my Vodka before saying the immortal words ' offer him £300 for it and not a penny more'   said my good night's and hung up before sleeping all night on the sofa.

The following morning I awoke with a bad back and even badder head and no memory of the previous nights phone call,  until the second call came that afternoon to say it was all mine,  oh good lord I thought to myself,  what have I let myself in for?????
Being an honest sort who would never back out of a deal I arranged to collect the car the following weekend after flying home,  the trailer was hired and off I set for darkest rural Dorset,  the place was so remote the sat navigation gave up directing me some 1/2 mile from the farm and advised me to do a 'U turn' ,  that may have been sound advice from what followed.

The owner emerged from one of the barns looking every inch the character from 'Father Ted'.  Wild curly white hair,  wonky eyes,  wellies   ripped jumper and a pipe,  speaking in the broadest Dorset accent which I'll only attempt this once he boomed '  Arrrrr ye lost or can oii elp eee with sumthin? '   quickly I explained who I was and that I was here for the car,  he gave me a gappy toothed grin and led me to the barn and flicked a switch so that 8 dusty fluorescent lights blinked into life revealing the car in question.

It was every bit as rough as Neale described,  I climbed inside,  the roof lining was sagging so far it nestled around my head and shoulders making me look like an extra from a Bonnie Tyler video.  After Father Ted connected a booster pack she fired up on the third attempt with a deafening roar,  the exhaust had more holes than a good cheese,  I slowly rolled out into daylight with instructions not to run it for long before loading it,  so I took off down the lane in second gear, exhaust blaring while trying to see through the roof lining that was doubling as a wedding veil and the growing cloud of smoke coming from under the bonnet.
​
A hasty retreat to the barn found his holiness clutching holy water in the former of a 'fire extinguisher' ,  inspection under the bonnet revealed decent quantities of petrol flooding out of the carb joints all over the exhaust manifold causing the aforementioned smoky cloud,  after making sure nothing was on fire I swept the cobwebs, dust and fluff from my hair that the headlining had deposited earlier, loaded the Princess onto the trailer and bid Ted goodbye,  he waved the wad of £300 I had just given him at me and said ' best of luck young un, best of luck'.
Picture
I made the short 15 mile drive to my brothers house near Lyme Regis to stay for the night before heading to Brummie land the following morning,  as I arrived in their rather nice neighbour hood I was met with laughter from my brother due to actually going through with it,  horror from his wife who was worried the neighbours would see it and suggested maybe it could be covered overnight,  my plummy accented 9yo nephew then guffawed ' oh uncle Gar you are a hoot buying tat,  I shall have to call you Uncle Steptoe from now on'.
​
After stopping myself from kicking him up the backside with my 'size 12 boot' I retired to their house for a large drink,  thinking the day was ending in a similar way to the one that got me into this situation in the first place.

​Part 2 to follow 

If you enjoyed this blog...

...please help us keep the group going - buy or donate in our online shop. All profits help fund future group activities.

0 Comments

    RSS Feed

Picture
Picture
Privacy Policy 

© 2025 Enthusiasts of British Motor Vehicles
  • Home
  • News
  • Events
  • Blogs
  • Photo Galleries
    • 2025 >
      • 2025 Pride of Longbridge Show ​Photo Gallery
      • 2025 NEC Resto Show ​Photo Gallery
      • 2025 Yorkshire Moors & Coastal Towns Tour ​Photo Gallery
    • 2024 >
      • 2024 BL Autumn Rally ​Photo Gallery
      • 2024 Fabulous Fourth Peak District Tour Gallery Gallery
      • 2024 Glos Vintage & Country Extravaganza Gallery
      • 2024 North Devon Tour Photo Gallery
      • 2024 NEC Restoration Show Photo Gallery
      • 2024 Norfolk Tour Photo Gallery
      • 2024 Coal in the Valleys Photo Gallery
    • 2023 >
      • 2023 NEC Classic Motor Show Photo Gallery
      • 2023 Fat Lamb 3 Tour Photo Gallery
      • 2023 Warwickshire Tour Photo Gallery
      • 2023 Lucas isn't bored Photo Gallery
      • 2023 Gar's birthday tour of Devon Photo Gallery
      • 2023 Shropshire Tour Photo Gallery
      • 2023 Anglesey & Snowdonia Tour Photo Gallery
    • 2022 >
      • 2022 Classic Motor Show Gallery
      • 2022 Fat Lamb Tour Gallery
      • 2022 NC500 - the Grand Tour of the Scottish Coast Photo Gallery
      • 2022 Glos Vintage & Country Extravaganza Gallery
      • 2022 Best of Yorkshire Tour Gallery
      • 2022 Peak District Revisited Tour Gallery
      • 2022 Gaydon Weekend Gallery
      • 2022 NEC Resto Show Gallery
      • 2022 Forest of Dean Winter Tour Gallery
    • 2021 >
      • 2021 Classic Motor Show Gallery
      • 2021 Fat Lamb Tour Gallery
      • 2021 Welsh Tour Gallery
      • 2021 Jurassic Coast Tour Gallery
      • 2021 Crich Museum & Tour Gallery
      • 2021 Staffs Oatcake Tour Gallery
      • 2021 Boston CCC Show Photo Gallery
    • 2019 >
      • Yorkshire Moors Driving Tour 2019
      • Lancaster Insurance Classic Motor Show NEC Nov 2019
      • New Forest Driving Tour 2019
      • Gloucester Vintage & Steam Extravaganza Photo Gallery 2019
      • Tour of the Dark Peak Photo Gallery 2019
      • Codgers do the Cotswolds 2019
      • Bubble Car Museum Gallery 2019
      • Brecon Beacons driving tour 2019
      • Morgan Factory tour 2019
      • Practical Classics Classic Car & Restoration Show 2019
    • 2018 >
      • Lancaster Insurance Classic Motor Show NEC November 2018
      • Isle of Wight Tour 2018
      • Brunel's Somerset Tour Gallery 2018
      • Gloucester Vintage Extravaganza 2018
      • Maesteg Charity Classic Car Show & Driving Tour 2018
      • Bubble Car Museum & Driving Tour 2018
      • Peak District Driving Tour 2018
      • Practical Classics Classic Car & Restoration Show 2018
      • Coventry Transport Museum 2018 >
        • Joel Lodder's 2018 Coventry meet gallery
    • 2017 >
      • Lancaster Insurance Classic Motor Show NEC November 2017
      • Snowdonia Driving Tour 2017
      • Gloucester Vintage Extravaganza 2017
      • Lupin Farm Charity Car Show 2017
      • The Shackleton Trust 2017
      • Crich Tramway Museum 2017
      • Bubble Car Museum 2017
      • Pride of Longbridge 2017
      • April 2017 Practical Classics Restoration Show (NEC)
    • 2016 >
      • Crich Tramway Museum 2016
    • 2015 >
      • Bubble Car Museum 2015
      • Coventry Transport Museum 2015
  • YouTube
  • Insurance
  • Shop
  • Mailing List
  • Contact
  • Join
  • About